CARDFIGHT!! VANGUARD overDress
CARDFIGHT!! VANGUARD overDress is the newest iteration of the long-running Trading Card Game! This new series not only includes a new animation with character designs by CLAMP and anime production by Kinema Citrus, it also heralds the beginning of a new format, new cards and new mechanics. This article will serve as a guide for you to begin playing the game and having fun in this new era!
This article is broken down into these few sections:
The Beginning of a New Era
Intro
With the ushering in of the overDress series, there were many new changes to the game. This came in the form of 5 things.
1. A New Format
The game, which originally consisted of Standard – where you can only use the newest cards from the V series – and Premium – where all cards can be used – was further segregated into 3 formats: Standard, V-Premium and Premium.
Standard – This format consists of only cards that have a ![]() icon at the bottom left hand corner of the card. In this format, a ride deck must be used.
icon at the bottom left hand corner of the card. In this format, a ride deck must be used.
V-Premium – This format consists of only cards that have a ![]() icon at the bottom left hand corner of the card. This format used to be the Standard format of the game.
icon at the bottom left hand corner of the card. This format used to be the Standard format of the game.
Premium – This format consists of all cards that have ever been printed in during the existence of the game.
2. Ride Deck
In the Standard format, each player needs to prepare 4 cards from their deck and remove them from the deck before the game. During a player’s ride phase, they may discard a card from their hand and ride a card from the ride deck.
The implementation of this rule allowed for players to never get grade-stuck ever again. (grade-stuck: the phenomenon when a player is unable to ride to the next grade because they do not have the specific grade to ride to in their hand)
Furthermore, it allows for more Vanguard abilities to be executed consistently as the player would always have access to them through the Ride Deck.
3. Nations
In the Standard format, the 24 clans of the previous era have been condensed into nations. The changes are as follows:
| Clans | Nation |
|---|---|
| Kagero, Narukami, Murakumo, Nubatama, Tachikaze | Dragon Empire |
| Dark Irregulars, Pale Moon, Spike Brothers, Gear Chronicle | Dark States |
| Nova Grappler, Dimension Police, Link Joker | Brandt Gate |
| Royal Paladin, Shadow Paladin, Gold Paladin, Oracle Think Tank, Genesis, Angel Feather | Keter Sanctuary |
| Great Nature, Neo Nectar, Megacolony, Granblue, Aqua Force | Stoicheia |
| Bermuda Triangle | Lyrical Monasterio |
Previously, the policy was for each clan to receive support once a year, which meant that players often had to wait for long periods of time before their favorite clan would receive support. To meet this requirement, products were released every month to ensure each clan received at least one power-up per year.
With this new system, every nation would receive upgrades equally every release, and releases can be spaced further apart!
4. Persona Ride
Grade 3 units in the Standard Format currently all have the Persona Ride icon. During your ride phase, when you ride a unit with the same name as your Vanguard, your front row receives a +10 000 power buff until the end of your turn, and you get to draw a card.
This new feature allows players to power up their attacks while allowing them to draw cards from their deck, sometimes even allowing players to come back from the brink of defeat and turn the tide!
5. Over Trigger
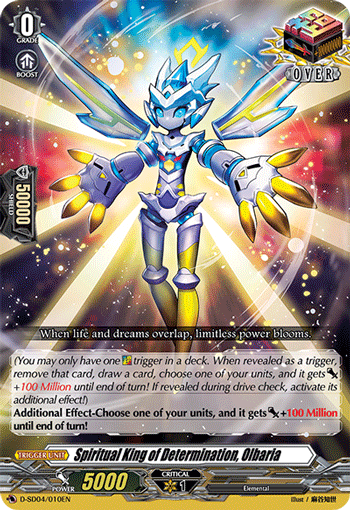
A major addition to the game that has caused quite a stir! Players can only include a single Over Trigger in the deck – and for a good reason! When revealed during a trigger check, this unit will give one of the player’s units a +100 000 000 power buff.
Additionally, when it is revealed through a drive check, you may activate the Over Trigger’s bonus effect and remove it from the game.
When an Over Trigger is revealed in a damage check, you may simply remove it from the game (in essence, a free Heal trigger)!
If you draw this card, this Over Trigger provides a massive 50 000 Shield, allowing you to block most attacks in the current format.
Ride Lines
Due to the implementation of the Ride Deck, there are now ride lines that each nation has. These ride lines are usually very powerful Vanguards, and are usually put in the deck solely for use in the Ride Deck. Let’s have a look at some of these ride lines and see what kind of build they necessitate! *These ride lines are updated from DBT01 – Genesis of the Five Greats.

Nirvana Ride Line
Playstyle: Aggro
This is the very first deck that was revealed for the Standard format, and it is currently used by Yu-yu Kondo in the anime. This deck revolves around attacking the opponent with high numbers per attack, while playing around with the overDress keyword to create strong Vairina variants that have powerful abilities.
Nirvana players are able to get to key pieces relatively quickly due to the immense draw power that certain cards have. It’s very simple to play, and it’s very accessible as it has been released in the readily available Start Deck 01: Yu-yu Kondo -Holy Dragon-!
The deck itself can be quite Counter-Blast hungry, and also relies on drawing into overDress units in order to pressure the opponent. In Order to make sure that the deck doesn’t run out of steam, Nirvana players have to play aggressively and try their best to end the game quickly.
Sample Decklist:
| Card Name | Grade | Quantity |
|---|---|---|
| Chakrabarthi Divine Dragon, Nirvana | 3 | 4 (1 in ride deck) |
| Blaze Maiden, Reiyu | 2 | 1 (1 in ride deck) |
| Blaze Maiden, Rino | 1 | 1 (in ride deck) |
| Sunrise Egg | 0 | 1 (in ride deck) |
| Vairina Valiente | 3 | 4 |
| Vairina | 2 | 4 |
| Vairina Arcs | 2 | 4 |
| Stealth Dragon, Tensha Stead | 1 | 4 |
| Extremist Dragon, Velocihazard | 1 | 3 |
| Twin Buckler Dragon (Perfect Guard) | 1 | 4 |
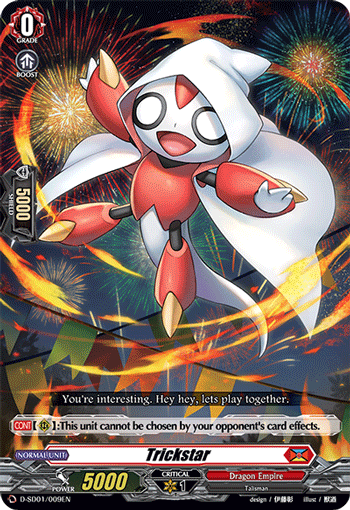
| Trickstar | 0 | 4 |
| Blaze Maiden, Rona (Heal) | 0 | 4 |
| Blaze Maiden, Zonne (Critical) | 0 | 4 |
| Conduct Spark Dragon (Critical) | 0 | 4 |
| Blaze Staff Monk, Cho Kuu Sha (Draw) | 0 | 3 |
| Dragon King of Resurgence, Dragveda (Over Trigger) | 0 | 1 |
Let’s have a look at some key cards in the deck.
Ride Deck
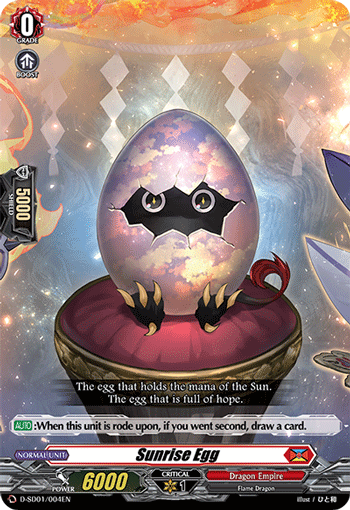
Sunrise Egg will be your First Vanguard for the most part. It doesn’t do much, as with most starting vanguards in the Standard format.
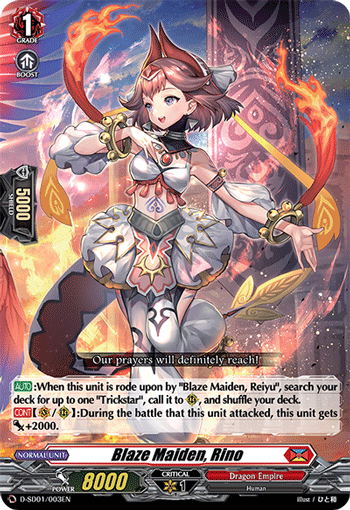
All Nirvana players will go into Rino as their first Grade 1 Vanguard. While this card doesn’t do anything when rode upon, its vanguard ability allows the player to search for a Trickstar from the deck when Reiyu is rode upon; this Trickstar can then be used for overDress with Vairina variants.
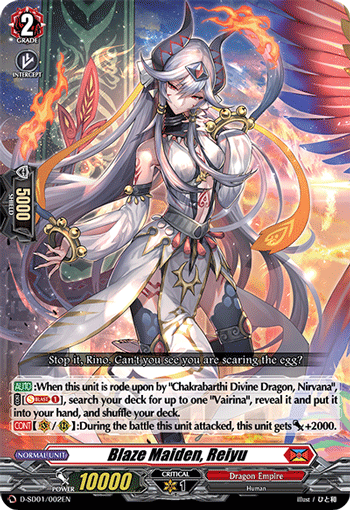
Next up, Reiyu will be the Grade 2 that all Nirvana players will ride into. When rode upon, Rino’s ability activates to allow the player to search their deck for a Trickstar to use for overDress.
Furthermore, when this card is rode upon upon by Nirvana, its ability looks through the deck for a Vairina and adds it to the player’s hand for the cost of one Soul-Blast. This gives the player an opportunity to overDress the Trickstar called during the G2 turn with Vairina, a powerful attacker with field control tools.
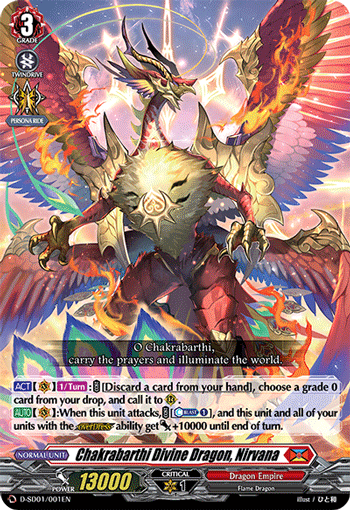
Nirvana is your main Grade 3. This card is the main engine for the overDress mechanic to shine. Its first ability allows the player to retrieve a Grade 0 from the drop and call it to the field; this ability is always used to retrieve a Trickstar from the drop to be used as overDress material.
Nirvana’s second ability activates when it attacks. With a cost of 1 Counter-Blast, Nirvana gives units with the overDress ability and itself a +10 000 power bonus. This allows it and the overDress units to hit for high numbers, pressuring the opponent to guard the high-octane attacks.
Furthermore, when this is rode upon, Reiyu’s ability activates to search the deck for a Vairina to put into hand, which gives Nirvana an overDress unit to work with to begin hitting the opponent with high numbers.
Must-Haves:
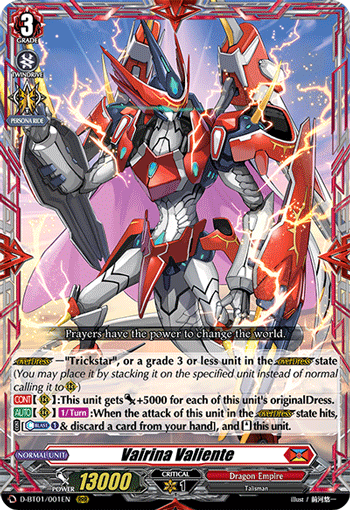
Vairina Valiente is the main offensive weapon of the deck. It becomes a powerful attacker with each originalDress unit under it (+5000 for each card), and it also provides on-hit pressure (restand on hit) that forces the opponent to think twice about allowing Vairina Valiente’s attack to hit. It’s also a difficult card to remove off the field because the cumulative +5000 power lasts even during the opponent’s turn!
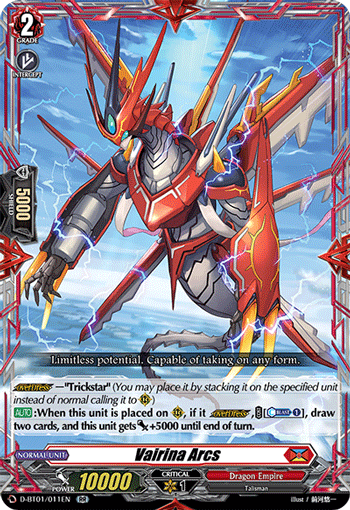
Vairina Arcs is one of the most important cards for this deck, and it is likely to remain so for a very long time. This card draws more cards from the deck when overDressed, allowing the player to gain more hand advantage and add more key pieces to hand. This boosts the consistency of the deck overall, and allows the deck to be extremely aggressive once Nirvana is rode upon.
It’s highly recommended to mulligan looking for this card – if you have 1 damage by your grade 2 turn, using Arcs to draw cards while putting on the pressure early will definitely help you take control of the game at an early stage!
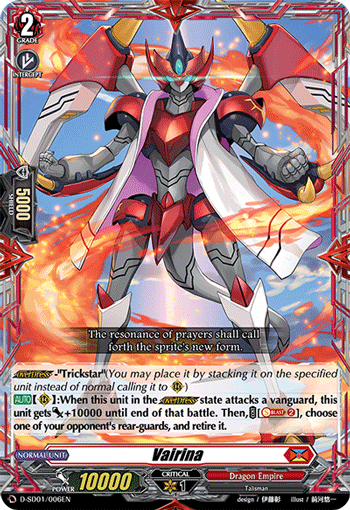
Vairina’s base form is something that players should also take into account when deck-building. This card boasts very high power, being able to hit at 30 000 power with the buff from Nirvana’s attack and its own ability, which gives itself +10 000 when in the overDress state.
It also has control tools to retire one of the opponent’s rear-guards, but beware! This deck doesn’t generate Soul as quickly as some other decks, so you may have limited shots of this.
Options:
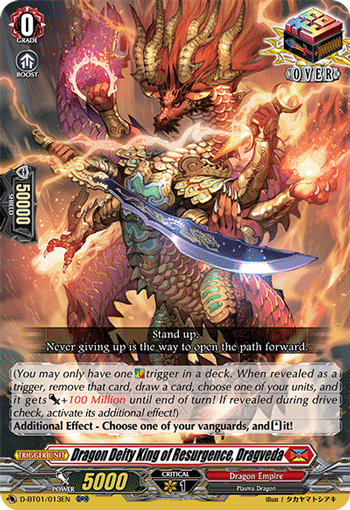
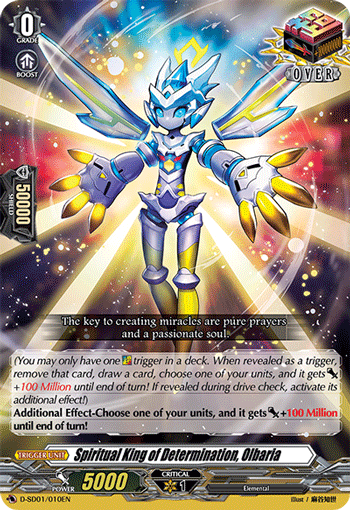
There are merits to running either Dragveda or Olbaria, and it’s up to the player to decide which suits their style better!
Dragveda is usually an all around good card at any situation in the game; when drive checked at any point, it essentially gives the opponent two damage (restands the player’s Vanguard and gives an opportunity for another attack) and you get more drive checks. This is especially good when at Grade 3, as you can activate Nirvana’s ability twice to beef up your front row by 20 000 power.
On the other hand, Olbaria is potentially a game-winning Over Trigger. When drive checked, it is possible to place the 100 000 000 power on two Valientes in the front row, forcing the opponent to guard both high-powered attacks with a possible chance of a restand. Players may consider this as an option because Olbaria is readily available in the Start Deck.
Some players may also decide to change their starter from Sunrise Egg to Trickstar. This is done for two reasons.
Firstly, it is to ensure that the player has an additional Trickstar to work with when Nirvana is rode upon.
When Nirvana is placed on the vanguard circle, Reiyu’s ability searches the deck for Vairina for the cost of 1 Soul-Blast. Trickstar will be Soul-Blasted, and Nirvana can then retrieve the Trickstar from the drop with its first ability.
If the opponent did not get rid of the other Trickstar/ Vairina overDress that the Nirvana player called down on his Grade 2 turn, the Nirvana player will thus have the opportunity to have two overDressed units on the board, ready to attack the opponent.
Secondly, it allows the Nirvana player to have an extra slot in the deck to run another card. They could possibly run another copy of Velocihazard, or other defensive and control tools.
Of course, running Trickstar as a starter will mean that the Nirvana player will not get an additional card draw should they go second, but it allows for more consistency in ensuring double overDressed units the moment Nirvana becomes active on the board.
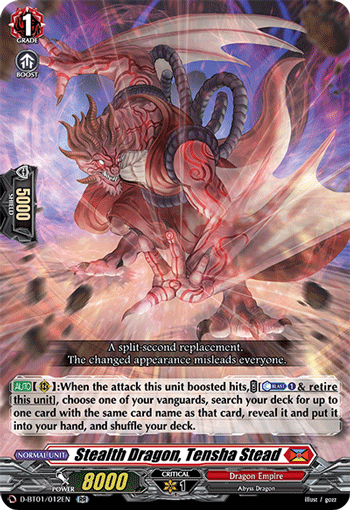
Another card to consider in deck-building is Tensha Stead. This card allows the player to retrieve a copy of their vanguard from their deck when the attack that Tensha Stead boosted hits. It allows the Nirvana deck to Persona Ride consistently, while also pressuring the opponent to throw out cards to guard the attack that this unit boosted.
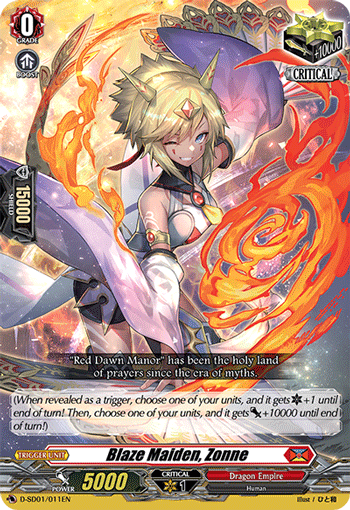
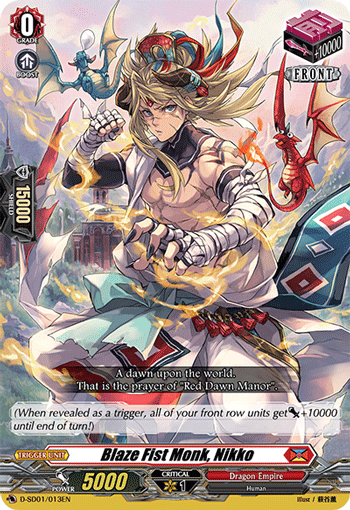
One may also think about running more Critical Triggers or Front Triggers. Either choice is alright; Critical Triggers offer more pressure in attacking units, while Front Triggers allow attacking units to hit for nearly unblockable attacks. It is entirely up to the player as to what type of trigger they would like to run, but there are pros and cons to using either one.

Another consideration is the usage of Draw Triggers in the deck. One argument against the use of Draw Triggers is that the deck itself already draws many cards to get to key pieces quickly, thus it is more optimal to run more pressuring Triggers like Criticals and Fronts.
However, this idea is based around the idea of getting Vairina Arcs early in order to supply cards to the player’s hand. As a 4-of in the deck, Vairina Arcs would be the only card to increase the Nirvana’s player’s hand advantage. Thus, going without Draw Triggers would be a more risky choice as the Nirvana player can easily run out of steam if the opponent can weather the attacks.
Things to take note of:
1. Counter-Blast
As this deck is very reliant on Counter-Blast to make significant plays on the battlefield, Nirvana players have to be careful to use this resource shrewdly in order to outmanoeuvre the opponent. There may be cards in the future that help to mitigate the cost of using some of the more powerful abilities , but it is important that players do not overcommit to pushing for game and use up all their resources if they know that their opponent still has a strong defence.
2. Field Control from opponents
This is extremely important as some decks have field control tools that are able to easily remove the important Vairina variants off the field for a low cost.
These decks include Seraph Snow, Eugene and Baromagnes; there are also decks that run cards that can retire Vairina variants, such as Diabolos’ Eden. If the opponent is able to retire them, players are still able to retrieve the Trickstar from the drop by discarding a card for Nirvana’s first ability, but they will not be able to get back the overDressed card.
If the opponent plays a Seraph Snow deck instead, while the Nirvana player will be able to get back their Imprisoned cards, they will not be able to overDress them from the Prison; the originalDress and overDress cards will be called to separate rear-guard circles.
As such, Nirvana players must know when is the right time to commit key rear-guards like Vairina Valiente and Vairina onto the board for a push.
Dust Storm Ride Line
Playstyle: Control
Moving on to the Dust Storms, who roam the deserts of Cray in search of a worthy foe to battle against. The Dust Storm ride line is a complex deck to pilot, but when planned correctly, players will be able to win their battles steadily.
Dust Storm players will be able to retire key rear-guards on the opponent’s field with relatively easy conditions, and once the opponent’s battlefield is cleared, they will be able to fill up their board with attackers to turn the tide of the game! Furthermore, their units will be able to create pressure for an oppressive vanguard attack! This deck can be readily built from cards found in the first Booster Set and the first Start Deck.
Sample Decklist:
| Card Name | Grade | Quantity |
|---|---|---|
| Heavy Artillery of Dust Storm, Eugene | 3 | 4 (1 in ride deck) |
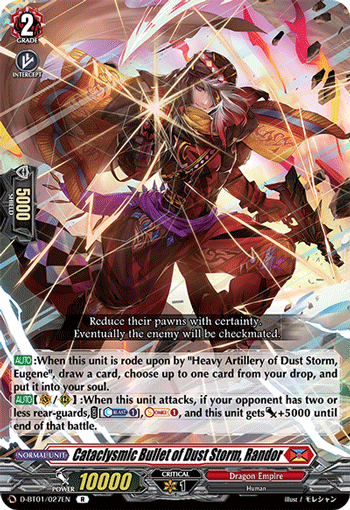
| Cataclysmic Bullet of Dust Storm, Randor | 2 | 4 (1 in ride deck) |
| Gunning of Dust Storm, Nigel | 1 | 3 (1 in ride deck) |
| Double Gun of Dust Storm, Bart | 0 | 1 (1 in ride deck) |
| Penetrate Dragon, Tribash | 3 | 4 |
| Sunlight Punishment | 3 | 2 |
| Stealth Rogue of Iron Blade, Oshikuni | 2 | 3 |
| Dragritter, Dabbaax | 2 | 2 |
| Stealth Dragon, Tensha Stead | 1 | 4 |
| Stealth Fiend, Shigamanago | 1 | 3 |
| Twin Buckler Dragon (Perfect Guard) | 1 | 4 |
| Blaze Maiden, Zonne (Critical) | 0 | 4 |
| Conduct Spark Dragon (Critical) | 0 | 4 |
| Rushing Dragon, Steel Dilopho (Draw) | 0 | 3 |
| White Light Dragon, Parasolace (Heal) | 0 | 4 |
| Dragon King of Resurgence, Dragveda (Over Trigger) | 0 | 1 |
Ride Deck
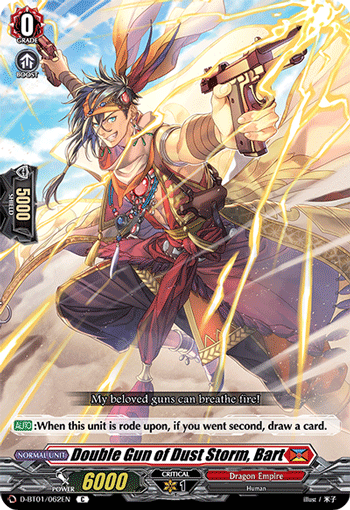
The First Vanguard of the Dust Storm ride line is represented by Bart! If you prefer the adorable Sunrise Egg, feel free to go for it!
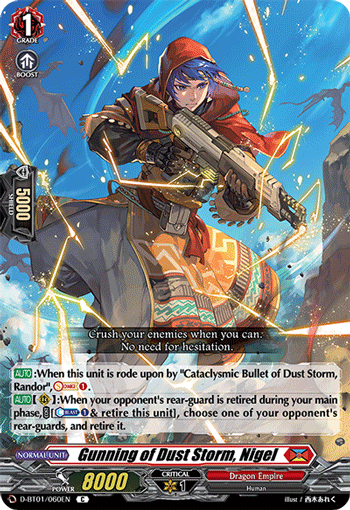
Nigel is the main Grade 1 of the Dust Storm ride line. This card doesn’t do much when ridden, but when Nigel is rode upon by Randor, its ability activates to Soul-Charge 1, which helps prepare for Eugene’s big turn.
Other than that, Nigel has a second ability that allows it to retire an additional unit, once an opponent’s rear-guard is retired during the main phase. It’s a bit costly, using up one Counter-Blast and removing itself from the field, but it’s a good way to remove key rear-guards on the opponent’s field. Furthermore, it frees up the battlefield for Eugene to superior call using his second ability.
When Randor is ridden, Nigel’s ability activates to Soul-Charge 1.
Randor has a rare ability that activates on vanguard and rear-guard circles. When Randor attacks, for the cost of one Counter-Blast, Randor Soul-Charges 1 and gains a +5000 power increment.
Of course, this ability can only activate when the opponent has two or less rear-guards, but this ability is usually active when this is rode upon and called as a rear-guard during Eugene turns, because the opponent probably has not committed many rear-guards to their side of the board yet.
Finally, when Randor is ridden by Eugene, the Eugene player gets to draw a card and put a card from the drop into their Soul. It helps to fill up Soul once again for Eugene’s ability and also adds some cards to hand for the Eugene player.

Eugene is the main Grade 3 for the Dust Storm ride line. When this card is ridden, Randor’s ability activates to draw a card and put a card in the drop into the Soul.
Eugene’s abilities synergise well with one another. This card’s first ability rests two rear-guards in order to retire one of the opponent’s rear-guards and give Eugene a +10 000 power bonus. This ability allows this unit to hit for higher numbers when it attacks, but more importantly it links directly to the unit’s second ability.
This card’s second ability is active if an opponent’s rear-guard was retired during the turn. When the player activates Eugene’s ability, they are able to look at the same number of cards from the top of the deck as the number of opponent’s open rear-guard circles, call any number of units from them, and refill the Soul with the rest.
This ability essentially allows Eugene to refill the board with attackers after resting for the first ability, or when other units remove themselves from the field due to their effects. However, players should try to use this second ability sparingly. They definitely have to look out for what kinds of cards they may superior call from the deck, or even whether or not their deck is running out of cards.
Must-haves:
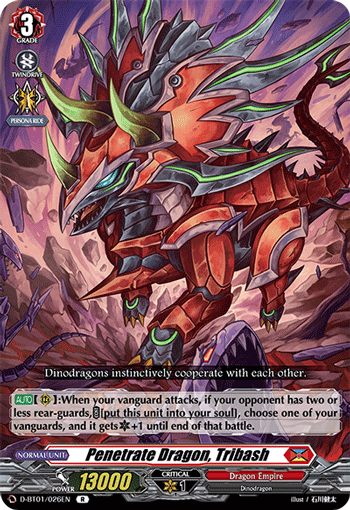
Tribash is exceptional in the fact that it gives Eugene a Critical to work with when it attacks. It also fills up the Soul and opens up a space on the board for Eugene to work with the next turn. The immense pressure that Tribash provides is irreplaceable in this deck!
Shigamanago is another key card to the functioning of the deck. This card is able to remove itself off the field when an opponent’s rear-guard is retired during the main phase. In doing so, the Dust Storm player can look at the top card of the deck and decide to call it to a rear-guard circle or fill up their Soul. This unit cycles through the deck to search for more powerful rear-guards to call down.
Tensha Stead is what makes this deck tick! With the number of cards dedicated to other aspects of the deck, the deck’s offense may be slightly lacking without Persona Ride. With Tensha Stead, the player can guarantee a heavier offense on the next turn.
Options:
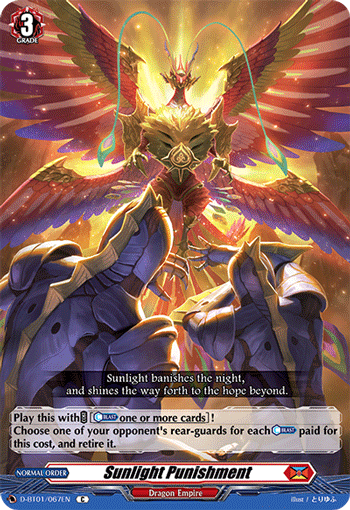
Sunlight Punishment is a great control tool that helps to clear the board of the opponent, while also activating many abilities, such as Eugene, Shigamanago and Nigel.
However, do use this sparingly as it eats up one Counter-Blast for each rear-guard retired. You could consider running this card in smaller quantities to make room for more offensive options in the deck.
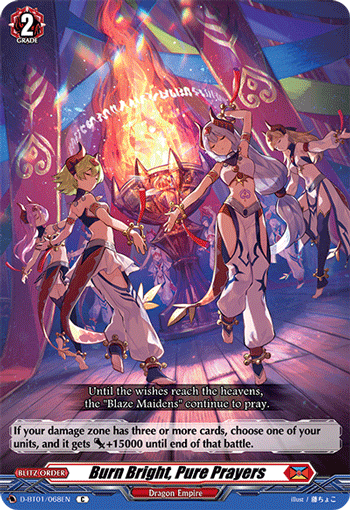
Pure Prayers are a great defensive tool, giving the defending player +15000 power until the end of the battle. It may be considered in more control Eugene builds that aim to grind out the opponent.
However, given that Pure Prayers is a Blitz Order, and that Orders can only be used once per turn, it would be ideal to run less than four pieces of this to maximize the offensive capabilities of the deck instead
Things to take note:
1. Resources
Eugene players should always try to have enough resources in general in order to counter anything that the opponent tries to use against them. This means that hand size and field advantage is something that Eugene players need to maximise throughout the game. This also includes the usage of Counter-Blast and Soul-Blast, but it is less of a pressing issue because the deck doesn’t use up those resources as much.
2. Defence
This deck might not be able to last well against very aggressive decks, such as Magnolia, Bastion and Nirvana. As such, preparing to defend well against these decks will be something important, such as saving up cards in hand to defend.
3. Planning
Eugene players need to plan well as they go into the battlefield. A clear path to victory needs to be forged against any opponent, and Eugene players need to be prepared to think ahead and predict the opponent’s plays and get ready to respond well to their moves.

Diabolos Ride Line
Playstyle: Combo
Looking for some EXCITING gameplay? Look no further than the arena of Dark States, filled with fans that are chanting the name of the most famous Gallows Ball team: Diabolos! Played by the intense leader of Team Blackout Danji Momoyama, this deck is one that requires lots of planning and resource management, but once the conditions are met for the “Final Rush”, the deck will be able to turn against the tide and lead the way to victory!
This deck is filled with cards that synergise with the signature keyword “Final Rush”, unlocking their true potential when it is active. Cards in this deck are readily available in the Start Deck 02: Danji Momoyama -Tyrant Tiger- and in the first Booster Set.
Sample Decklist:
| Card Name | Grade | Quantity |
|---|---|---|
| Diabolos, “Violence” Bruce | 3 | 4 (1 in ride deck) |
| Diabolos, “Anger” Richard | 2 | 1 (1 in ride deck) |
| Diabolos, “Bad” Steve | 1 | 1 (1 in ride deck) |
| Diabolos, “Innocent” Matt | 0 | 1 (1 in ride deck) |
| Upward Acrobat, Marjorie | 3 | 4 |
| Time-fissuring Gear Colossus | 3 | 4 |
| Diabolos Boys, Eden | 2 | 4 |
| Steam Gunner, Brody | 2 | 2 |
| Steam Battler, Gungnram | 1 | 3 |
| Acrobat Presenter | 1 | 3 |
| Protobulb Dragon | 1 | 3 |
| Recusal Hate Dragon (Perfect Guard) | 1 | 4 |
| Diabolos Girls, Arianna (Heal) | 0 | 4 |
| Diabolos Girls, Maimai (Critical) | 0 | 4 |
| Diabolos Boys, Jake (Draw) | 0 | 3 |
| Flinty Slasher (Critical) | 0 | 4 |
| Hades Dragon Deity of Resentment, Gallmageheld (Over Trigger) | 0 | 1 |
Ride Deck
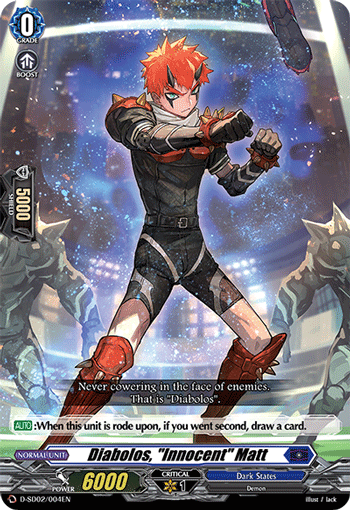
Matt will be the starting vanguard for most Diabolos ride line players, unless the player is trying to bait opponents into thinking that they are running the Baromagnes variant. While Matt does not do much ability-wise, the card is still helpful because it will be called out behind Steve when rode upon by the latter.
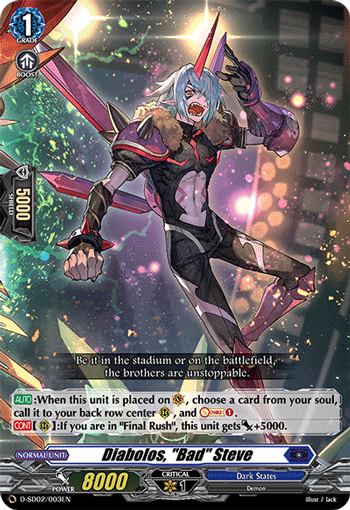
Steve helps to build up the Soul that Bruce will eventually use during the Final Rush turn, and this will also call out Matt behind it when this is placed on the vanguard circle. This ability will synergise with Richard when Richard is ridden on the next turn.
Steve also will gain +5000 power when Final Rush is active. However, most players will only run this card in the ride deck, because there are more impactful cards that come alive on Final Rush turns.
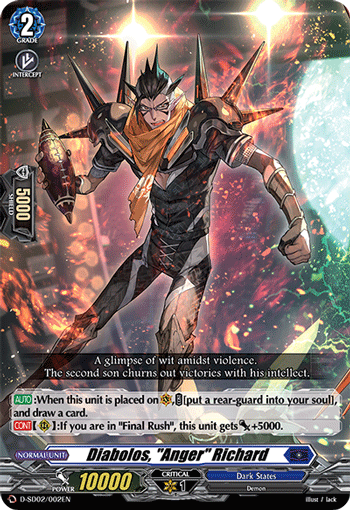
When Richard is placed on the vanguard circle, it can put in the previously called out Matt or any other rear-guard called out into the Soul to draw a card from the deck. This ability is especially important in building more Soul for Bruce during Final Rush turns as well as building up hand for guarding attacks or finding more key pieces.
This card’s second ability is the same as Steve’s second ability; once again, this is usually run in the ride deck so that more powerful Final Rush cards can be run in the deck.
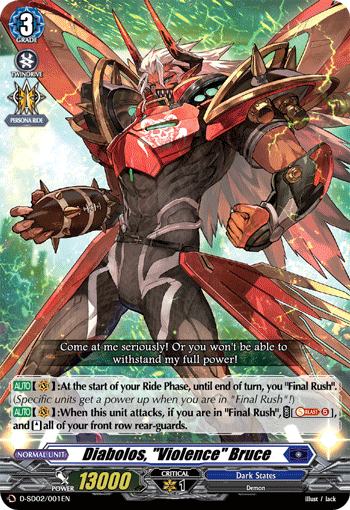
The main boss card, Bruce, is the powerhouse of the deck. Everything in the deck runs through this card, and only through Bruce can victory be ensured. This card’s first ability activates at the beginning of the ride phase, when it is already on the vanguard circle. Thus, Final Rush will only become active on the second turn that Bruce is on the vanguard circle.
Essentially, Bruce and the rest of the deck are vanilla cards until Final Rush becomes active on the player’s fourth turn. However, to compensate for this, Final Rush abilities are extremely powerful, and can overwhelm opponents if they do not finish off this Diabolos ride line fast enough.
This card’s second ability activates when it attacks, Soul-Blasting 5 cards to restand all of the player’s front row rear-guards. This Soul is readily gained from cards like Steve, Richard, Marjorie, Colossus, Acrobat Presenter and Gungnram. Thus, despite the seemingly hefty cost, it is actually quite reasonable to restand the front row every time Final Rush is active.
Must-Haves:
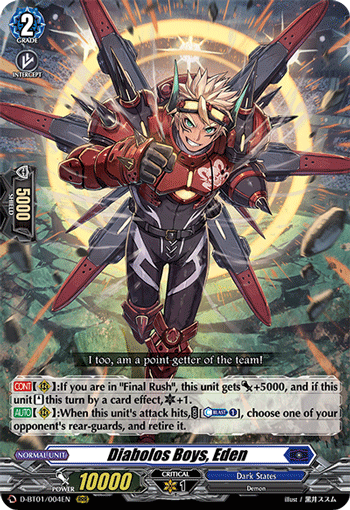
Eden is easily one of the best cards in the current format, hands down. On Final Rush turns, this card gains +5000 power, and when it restands (due to Bruce’s ability), it gains an extra Critical. This ability is what gives the Diabolos ride line so much pressure.
On top of what already is an amazing card, Eden is also able to remove one of the opponent’s rear-guards when it’s attack hits. Overall, it is such a great tool for Diabolos players that it is necessary to run 4 copies of it.
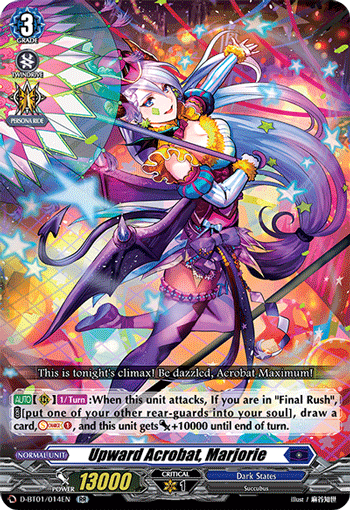
Marjorie is another amazing card that supports the Diabolos ride line. On Final Rush turns, this card is able to put one rear-guard to Soul to draw the Diabolos player one card, Soul-Charge 1 and give itself a +10 000 power buff.
This ability essentially fills up the Soul to be used by Bruce for restanding Marjorie and another rear-guard, and it also can be used to clear the board in case the opponent has a playstyle that focuses on removal (such as Seraph Snow and Eugene decks). This is also a card that you want to run 4 copies in the deck.
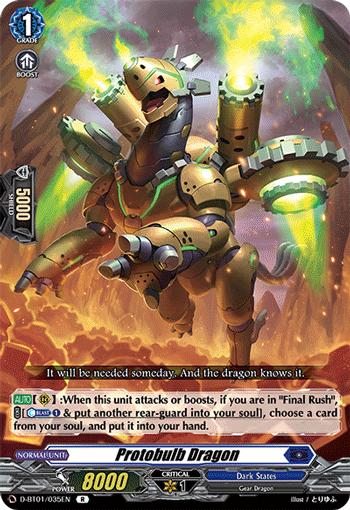
Protobulb Dragon is also another really awesome card in the Diabolos ride line. On Final Rush turns, it is able to put a rear-guard to Soul for the cost of 1 Counter-Blast to fetch a card from Soul into the player’s hand.
This opens up a myriad of possibilities as it can give the Diabolos player many cards to recycle. They could retrieve an Over Trigger or Perfect Guard from their Soul to use for guarding. They could fetch a Bruce to Persona Ride next turn. They could also fetch for more important key pieces like Eden and Marjorie. The versatility of this card is what makes it so powerful in the deck. It is recommended to run this as a 3-of as there are other important cards to run in the deck as well.
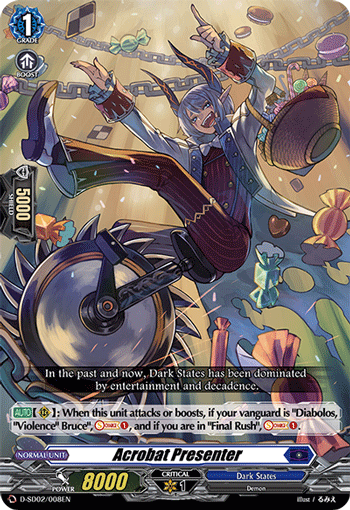
Finally, Acrobat Presenter is a card that should always see play in a Diabolos deck. Presenter is able to Soul-Charge 1 when it boosts, provided that your vanguard is Bruce. This is able to Soul-Charge an additional card if Final Rush is active. This card provides a reliable way for Diabolos players to gain Soul, along with Marjorie. Overall, this would be similar to Protobulb, in that it should be run as a 3-of.
Options:
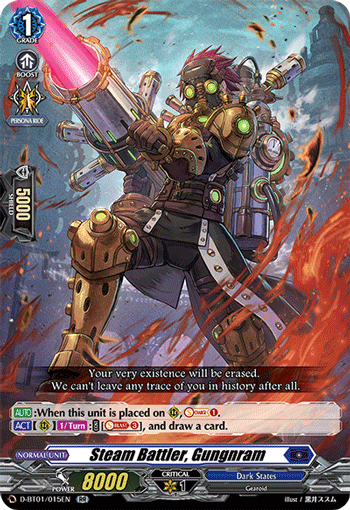
Both Gungnram and Electro Spartan are cards that Diabolos players may consider running in the deck so as to add more Soul-Charge capabilities into the deck.
Gungnram is usually more favoured because of its second ability, which allows the player to draw a card by Soul-Blasting 3 cards. This ability allows Diabolos players to add more to hand, especially during the early turns of the game when they are most vulnerable.
Spartan is just another option to add more Soul in preparation for Bruce. However, it may compete for spots in the deck with more impactful Final Rush cards. Thus, it is usually run as a 1-2 of in the deck should players decide to use it in the Diabolos ride line.
Both Gungnram and Electro Spartan are cards that Diabolos players may consider running in the deck so as to add more Soul-Charge capabilities into the deck.
The cards above may be considered when building your Diabolos deck as well. These cards specifically add more pressure to the already oppressive columns formed during Final Rush turns.
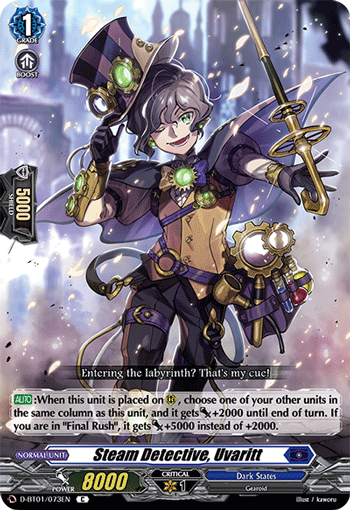
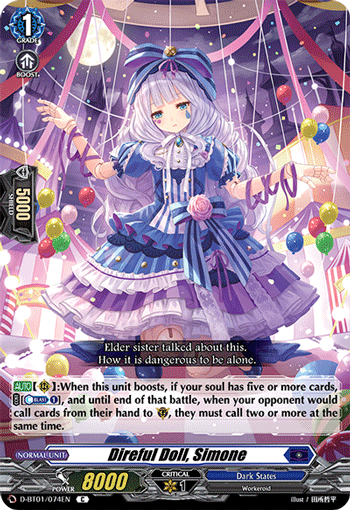
The Grade 3 Order could potentially be used with Eden to form an unstoppable force during game-ending turns. Uvaritt can be used for a similar role, although it only gives a +5000 increment. However, this card still makes up for it in boosting power and Shield value. Finally, Simone can be used as a way to force more cards out of the opponent’s hand during guarding.
However, both the Grade 3 Order and Simone are only useful when the Diabolos player has at least 5 Soul. On turns that they are unable to attain the five-Soul requirement for restanding, these cards become less than ideal. Thus, they are run sparingly in Diabolos decks.
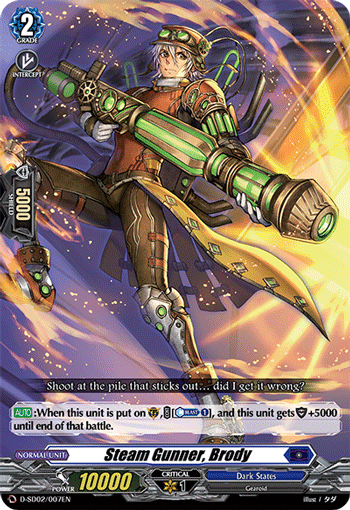
Brody and the Grade 1 Blitz Order are considered as defensive tools that a Diabolos player may put into their deck. The Diabolos deck is very vulnerable before the Final Rush turns, and it needs to keep itself alive before the engine can come online.
These two cards are good defensive tools to allow the Diabolos player to survive against more aggressive decks like Nirvana and Magnolia. Do note that Brody does not need to intercept to activate its ability; it can simply be put on the guardian circle to give itself an additional +5000 Shield.
One thing to consider as well in the Grade 1 Blitz Order is that it is only active when the player has five or more cards in Soul, so it has more use before Final Rush turns. Afterwards, the card becomes less useful, as it becomes more difficult to attain the 5-Soul requirement after the player has used Bruce’s ability every single turn.
Things to take note:
1. Soul management
This deck uses a lot of Soul, especially during the turns that Final Rush is active. In Order to ensure that Bruce’s second ability is consistently active, players will need to ensure that their Soul is sufficient. They will need to play cards that help to replenish Soul, such as Marjorie, Gungnram and Acrobat Presenter every turn.
2. Defense
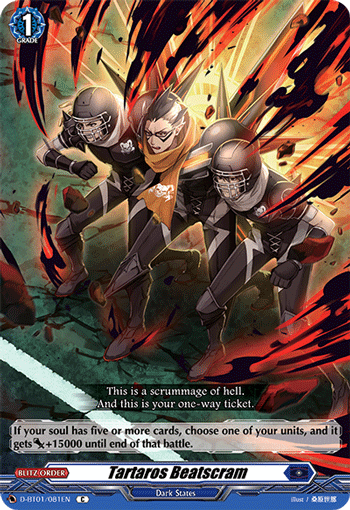
As this deck is susceptible to early aggression, it is important that Diabolos players prepare a strong defense, so that they can persevere until Final Rush is active. Cards like Brody and Tartaros Beatscram are especially helpful during the early game to help the deck stand a fighting chance against decks like Magnolia, Nirvana and Bastion.
3. Deck management
As the deck uses a lot of Soul, the cards in the deck may run low quickly. As such, players need to keep an eye out on the deck size to ensure that they do not lose the game by deck out.
4. Planning
This deck requires a lot of planning, especially in what cards to call down, what cards to use for defense, and what cards to sacrifice. Players need to have a clear winning image that is adaptable for different scenarios and be able to predict the opponent’s plays to counter them during their turn.
Baromagnes Ride Line
Playstyle: Combo
As we turn to the darker side of the Dark States, we find the leader of modified humans leading the way to battle: Baromagnes. This deck focuses on filling up the vanguard’s Soul up to a certain threshold and as the amount of Soul increases, Baromagnes becomes more powerful!. While the deck itself is prone to fall against aggressive decks, it is still able to stand strong and crush unsuspecting opponents.
This deck requires a lot of resource management, as players must try their best not to use up too much of their resources to reach the 15-Soul requirement to unlock Baromagnes’ full potential.
The Baromagnes deck is readily supported in the first Booster Set.
Sample Decklist:
| Card Name | Grade | Quantity |
|---|---|---|
| Master of Gravity, Baromagnes | 3 | 4 (1 in ride deck) |
| Electro Spartan | 2 | 4 (1 in ride deck) |
| Deep Soniker | 1 | 4 (1 in ride deck) |
| Uncanny Burning | 0 | 1 (1 in ride deck) |
| Phantasma Magician, Curtis | 3 | 4 |
| Crawl, You “Insects”! (Order) | 3 | 2 |
| Selfish Engraver | 2 | 4 |
| Steam Battler, Gungnram | 1 | 3 |
| Recusal Hate Dragon (Perfect Guard) | 1 | 4 |
| Brothers’ Soul (Order) | 1 | 3 |
| Tartaros Beatscram (Blitz Order) | 1 | 1 |
| Flinty Slasher (Critical) | 0 | 4 |
| Diabolos Girls, Maimai (Critical) | 0 | 4 |
| Steam Scara, Mal-Nigal (Heal) | 0 | 4 |
| Vital Leaver (Draw) | 0 | 3 |
| Hades Dragon Deity of Resentment, Gallmageheld (Over Trigger) | 0 | 1 |
Ride Deck
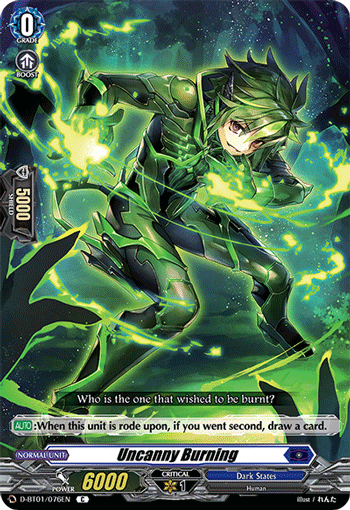
If you’re going for the Baromagnes ride line, there’s a high chance you’ll be going for this card as your First Vanguard to make sure you’re on-theme! This doesn’t do much, but at least the card looks pretty intimidating.
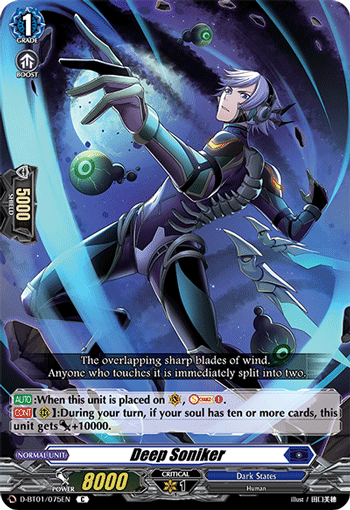
Deep Soniker is the main Grade 1 that Baromagnes players will go into. This has a simple ability of Soul-Charging 1 card when placed on the vanguard circle.
Its second ability, though, allows it to be an effective attacker when the 10-Soul requirement is achieved. This card remaining in the Soul after being rode upon by Electro Spartan will be quite important, as it will pretty much guarantee that it is usable as an attacker when Baromagnes has reached its full power.
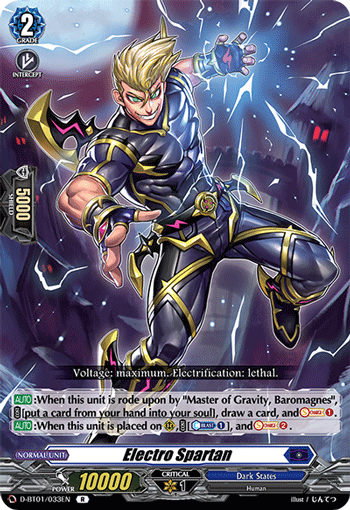
Electro Spartan is a very strong Grade 2 ride, but its first ability only pays off when Baromagnes rides upon this unit the following turn. That ability allows the player to put a card from hand to Soul (for example, maybe another Deep Soniker) and draw a card, while also Soul-Charging 1.
This card’s second ability activates when called to a rear-guard circle, which Soul-Charges 2 for the cost of 1 Counter-Blast. Overall, Spartan is one of the deck’s much needed Soul-Charging cards, helping to meet Baromagnes’ 15-Soul requirement much faster.
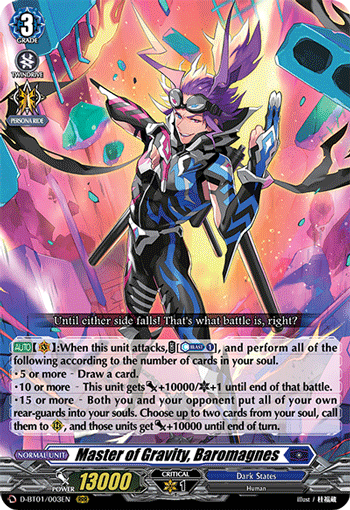
Baromagnes is the Grade 3 unit that this deck revolves around. This card only has one ability, but it progressively gets more powerful as the game goes on, as the player continues to build up Soul.
Usually by the time Baromagnes is ridden, the player will have attained the 10-Soul requirement, allowing them to deal significant damage to the opponent’s defenses.
By the next turn, Baromagnes will most definitely meet that sweet 15-Soul requirement, which grants the opportunity to multi-attack and clear both player’s fields. If opponents allow Baromagnes players to do as they please, they will most definitely be in deep trouble.
Must-Haves:
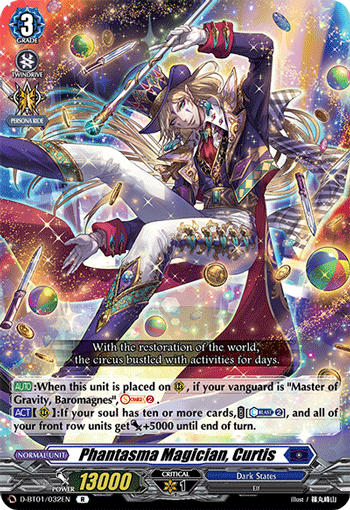
Curtis is a significant rear-guard that aids Baromagnes in Soul collecting. This card has a simple ability of Soul-Charging 2 when placed on a rear-guard circle if the vanguard is Baromagnes. This ability does not require any cost to pull off, and it is very necessary to use this to quickly build to the 15-Soul requirement.
The second ability is not as significant, as it eats up a lot of Counter-Blast to pull off; but it might be necessary in order to make attacking columns more difficult to guard.
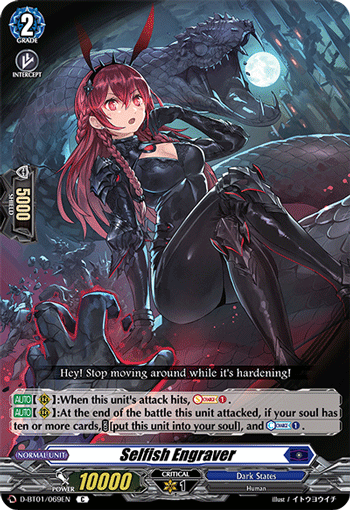
Selfish Engraver, is one of the best cards for Baromagnes, and is one of the most impactful cards of the first set. This is able to provide on-hit pressure which Soul-Charges 1, building up to Baromagnes’ 15-Soul requirement. Furthermore, at the end of the battle that this unit attacked, if there are 10 or more cards in the Soul, it can be put to Soul and provide a Counter-Charge for the player!
This second ability not only builds up more Soul for Baromagnes, it also ensures that Baromagnes has the Counter-Blast to pull off its own ability. A great all round card with even more amazing art, this card should always be a 4-of in Baromagnes decks. The fact that this card is of Common rarity should all the more encourage Baromagnes players to run this at max capacity.
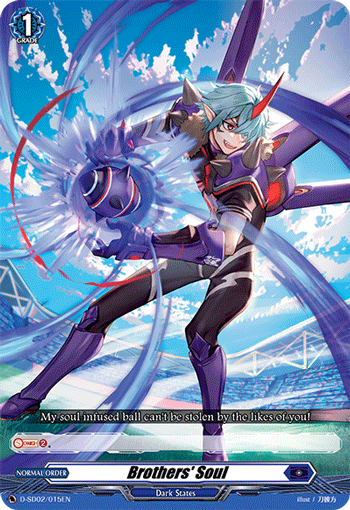
Brothers’ Soul is another important card that has to be run in a current Baromagnes deck. It is an Order that simply Soul-Charges 2. Once again, this card helps to build up Soul for Baromagnes, and given the lack of Soul-Charge options thus far in the format, Brothers’ Soul becomes a necessity in order for Baromagnes to turbo his way into the 15-Soul requirement.
What does help in the Order’s favour is that it does not require any other cost in casting, so it is quite a free card to play down.
Options:
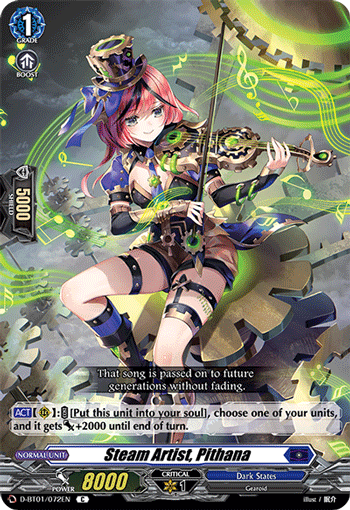
Players may consider running Pithana in the deck, as this card also helps to build up Soul for Baromagnes while giving another unit a small +2000 power bonus. While the card does function to put more cards to Soul, it may not be the best option as it necessitates calling it to the field from hand (given that Baromagnes does not have much superior calling from the deck or Soul during the main phase) and it results in losing cards to guard.
However, if the aim of the player is to turbo their way into 15 Soul to finish the opponent off at the expense of their own hand size, then Pithana may be considered as a piece that aids their quest.
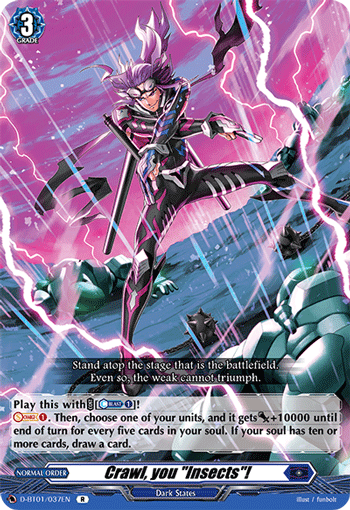
Crawl, you “Insects”! is a great card to run in the deck because the power buff it can give to one of the players’ units scales incrementally with every 5 Soul. It can allow a column to be extremely beefy, forcing even more cards out of the opponent’s hand to guard.
It significantly reduces the number of cards that the Baromagnes player has for guarding, though, so 2-3 copies maximum should suffice..
This Grade 1 Order can serve as an early defensive option in the deck, due to the fact that this deck is rather fragile in the early game. It should be played in lower quantities in the deck so that more slots can be allocated to pieces that accelerate the player to the 15-Soul requirement.
Simone may also be considered due to the guard pressure that it has. However, this may not be the best card to run, as the attacks that Baromagnes will more often than not demand many cards out of the opponent’s hand to guard.
Perhaps running this card at 1 or 2 copies in the deck will suffice, and it may come in handy in situations that Baromagnes players want to win the game against the opponent’s small hand.
Things to take note:
1. Defense
This deck is quite weak against early-game rush, so it is important that Baromagnes players try not to overcommit too much to the field in order to attain the 15-Soul requirement while losing their defenses against those decks.
2. Deck management
At a certain point in the game, Baromagnes players will need to take note of their deck size. They should ensure that they do not lose the game because of deck out. This deck Soul-Charges a lot, and players should know when is the best time to put a stop to Soul-Charging and instead push for game.

Bastion Ride Line
Playstyle: Aggro
We now head to the floating city in the sky that resides in Keter Sanctuary to meet the Cloud Knights. This deck is extremely powerful, being able to beat down on the opponent the moment that Bastion enters the battlefield. Furthermore, there are many powerful rear-guards that support Bastion in decimating the opponent early in the game, such as Alden and Fosado.
In the anime, it is very clear that Tohya has been a formidable opponent because of his prowess in using Bastion. This deck is also very accessible, having supporting cards available in Start Deck 03: Tohya Ebata -Apex Ruler- and in the first Booster Set.
Players will need to be careful against other aggressive decks when using Bastion, though, as this deck relies heavily on Grade 3s that do not have much defensive value.
Sample Decklist:
| Card Name | Grade | Quantity |
|---|---|---|
| Apex Ruler, Bastion | 3 | 4 (1 in ride deck) |
| Knight of Heavenly Spear, Rooks | 2 | 1 (1 in ride deck) |
| Knight of Heavenly Sword, Fort | 1 | 1 (1 in ride deck) |
| Knight of Heavenly Bow, Base | 0 | 1 (1 in ride deck) |
| Grand Heavenly Sword, Alden | 3 | 4 |
| Knight of War Damage, Fosado | 3 | 4 |
| Dark Strain Dragon | 3 | 4 |
| Actual Analyst, Kokabiel | 3 | 4 |
| Knight of Broadaxe, Rafluke | 3 | 4 |
| Divine Sister, Tartine | 1 | 3 |
| Aegismare Dragon (Perfect Guard) | 1 | 4 |
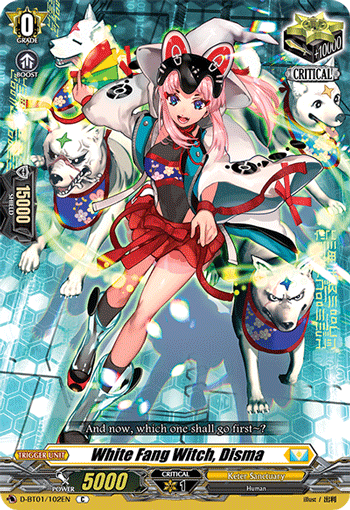
| White Fang Witch, Disma (Critical) | 0 | 4 |
| Knight of Heavenly Hammer, Gurgant (Critical) | 0 | 4 |
| Healer of Heavenly Staff, Arshes (Heal) | 0 | 4 |
| Knight of Heavenly Rend, Lif (Front) | 0 | 3 |
| Light Dragon Deity of Honors, Amartinoa (Over Trigger) | 0 | 1 |
Ride Deck
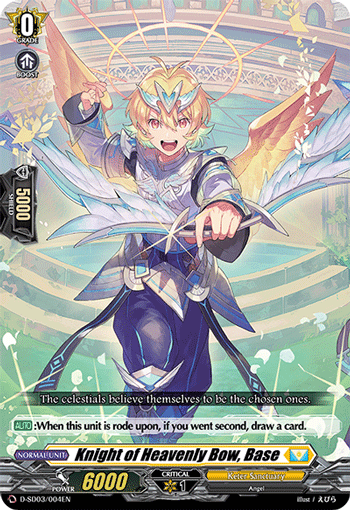
Base is the “base form” of the Cloud Knights ride line. This doesn’t do much, but the art on the card is always something to appreciate.
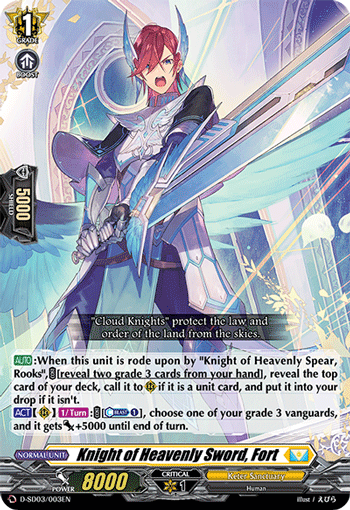
When Fort is first ridden, he doesn’t do much. However, Fort’s power lies in its first ability, which activates when Rooks is ridden.
By revealing two grade 3 cards in the player’s hand, they are able to check the top card of the deck to call a unit card, or put that card to drop if it isn’t. (in the case that one checks into an Order). It provides free advantage to the field, and it is able to potentially get a powerful Grade 3 on the field as early as turn 2. This adds to the beatdown nature of the deck.
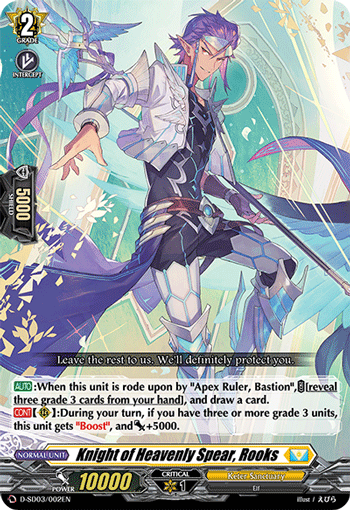
Rooks is another powerful Grade 2 vanguard ride. When this card is ridden, Fort’s ability activates, superior calling a unit card from the top of the deck. This is an opportunity to call down a grade 3 unit in the deck, which is quite likely due to the high grade 3 count in the deck.
Rooks also serves as a way to gain card advantage in hand, as when it is ridden by Bastion, its ability activates, and the player can reveal three grade 3 cards in their hand to draw a card. Free card draw is always welcome in a deck that needs cards for offense and defense, especially when the deck consists of a significant number of grade 3s.
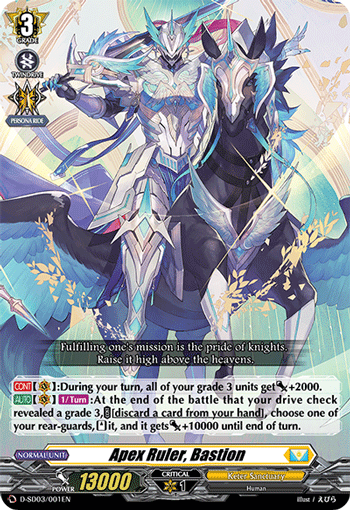
Bastion is one of the best Grade 3 vanguards in the format right now, and it’s not hard to see why. With other grade 3 units, Bastion shines extremely well.
This card’s first ability gives all grade 3 units a small increase in power, by +2000. It doesn’t seem like a lot of power, but if Bastion players go first, they are able to hit magic numbers at 15 000 while the opponent is at 10 000 power at Grade 2, forcing more than 5000 Shield from hand to guard Bastion’s attacks. Overall, the ability allows Grade 3 units to hit for higher numbers that force more guard out of the opponent’s hand.
Bastion’s second ability is what allows the deck to be so effective at beating down opponents. After the battle that the player’s drive check revealed a grade 3, the Bastion player can discard a card to restand a rear-guard and give it +10 000 power. The fact of the matter is that many players play many Grade 3s in a Bastion deck to use this ability reliably, so they would expect to always pull off the restand every turn.
Combine this ability with a Persona Ride and an Alden, and you can see why this deck is such a dominant force in the first set. Do note that this ability is not limited to vanguard drive checks, so if the player’s rear-guards do somehow drive check G3s (see Amartinoa), Bastion’s ability will still activate.
Must-haves:
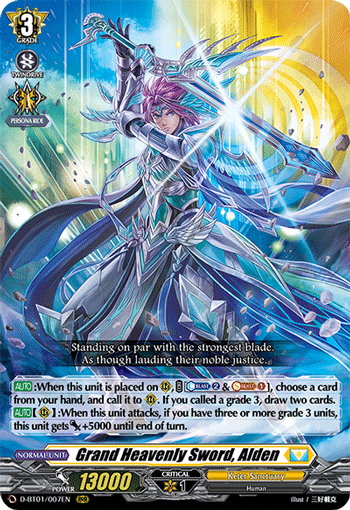
Alden is one of the most powerful cards of the set, not just for Bastion, but for Keter Sanctuary as a whole.
When Alden is placed, the player may pay the cost to call a card to a rear-guard circle. If the player calls a grade 3, the player may draw 2 cards. This essentially refunds the 2 cards the player used to call down onto the field, and allows them to cycle through the deck to find more key pieces or prepare the deck with more triggers or grade 3s. This ability is so powerful that many players have considered damage-denying Bastion players to prevent them from using this card the moment Bastion players ride up to Grade 3.
This card’s second ability is equally powerful. When this card attacks, if there are three or more grade 3 units on the field (inclusive of this card), it gains +5000 power until the end of turn. This power remains even if this card restands from Bastion’s ability, so that means that this unit can gain +10 000 power from its own ability alone for free, because Bastion players will always meet the requirement of 3 or more grade 3 units.
Add this power to a potential Persona Ride and Bastion’s restand power, and this card can easily hit 45 000 power without boosting on the 2nd swing.
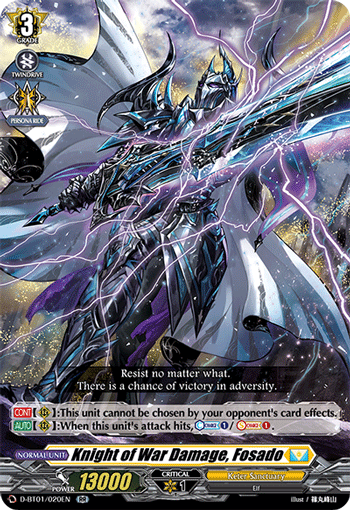
Fosado is another Grade 3 that is so integral to the gameplay of both Keter Sanctuary decks. First of all, Fosado cannot be chosen by the opponent’s card effects, so the card is practically immune to removal effects.
Its second ability adds pressure to the opponent to guard, as this card’s attack will allow for a Counter-Charge and Soul-Charge should it hit, regardless of the target. This card provides resources for Bastion to continue attacking the opponent with Alden and Dark Strain for boosting.
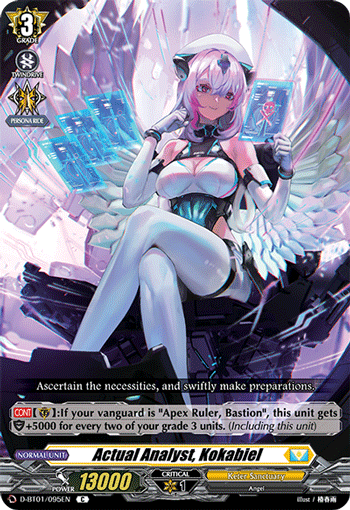
Kokabiel is a much needed defensive card for Bastion, as the deck’s defensive options are limited due to the high grade 3 count.
This unit provides an incremental 5000 Shield for every two grade 3 units on the player’s field. Its defensive prowess as a grade 3 is unprecedented , as it does not hinder Bastion’s second ability to restand units when it is drive checked (unlike triggers or G1/G2 normal units).
Because this card is of Common rarity, there is no excuse for Bastion players not to pick this card up as a 4-of in the deck.
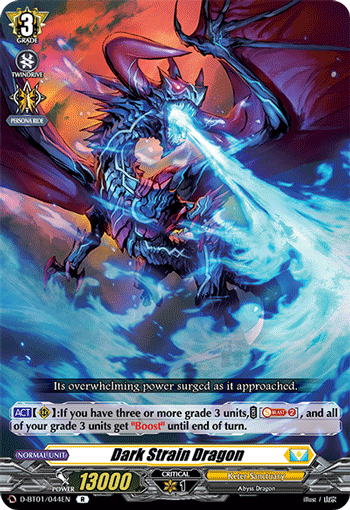
Dark Strain Dragon is another essential card that Bastion players should definitely pick up.
By Soul-Blasting 2 cards when there are three or more grade 3 units on the field, all of the player’s grade 3 units get Boost until the end of the turn. This allows the Bastion player to play many grade 3 units from their hand onto the field to be boosters for the turn, which do not reduce Shield value in the hand given that grade 3s have no Shield in the format.
Its ability allows attacking columns to be extremely massive to force ridiculous amounts of Shield from the opponent to guard attacks. The Soul required for its ability can easily be replenished for the next turn by Rafluke and Fosado, so it will always be a present threat on the field. It should be an easy card to pick up as a Rare card.
Options:
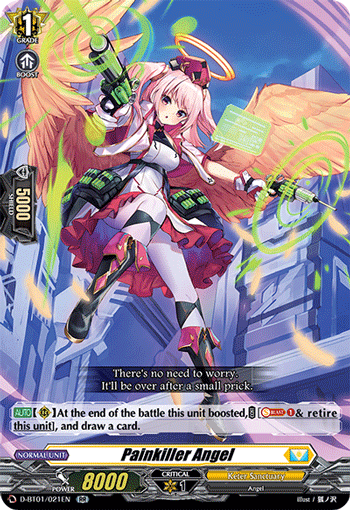
Painkiller Angel is a tool that Bastion players may consider using as the card is able to cycle through the deck faster by drawing the player a card after boosting, all for the cost of one Soul-Blast.
The card also provides much needed guard for a Shield-starved deck, but it may not be as effective in the deck as the consistency of hitting grade 3s for Bastion might be lowered.
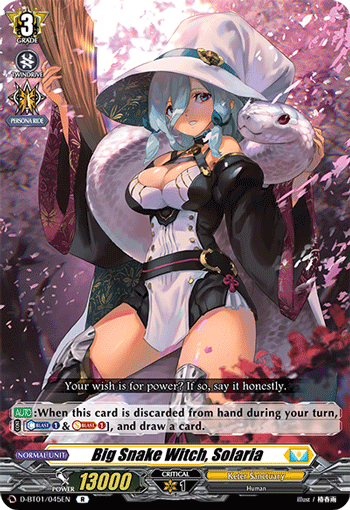
Solaria also fulfills a similar role in that the card cycles the deck more. However, this is limited to when it is discarded, but this can be achieved when discarding for the ride deck or for Bastion’s ability. Being a grade 3 also helps in the consistency of the hitting grade 3s for Bastion.
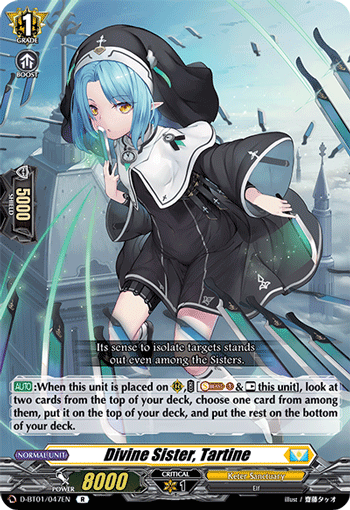
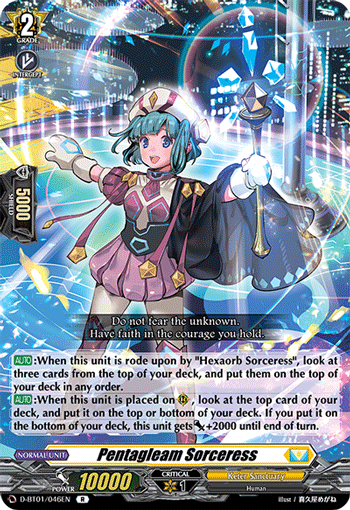
Both Pentagleam Sorceress and Tartine fulfill the same role in the deck: they help to filter the deck for more optimal units to be drive checked: G3 units and trigger units. Both are extremely effective in their role, but it may be costly to run too many of them to sacrifice the G3 count, and inadvertently the core gameplay of Bastion’s ability.
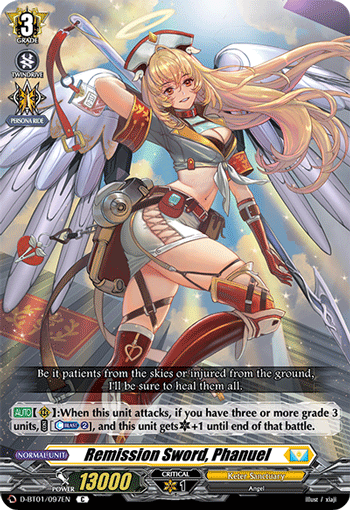
Phanuel and Lepisto are both cards that Bastion players may consider running to add more pressure in their attacks. The idea to run Lepisto would usually be given more weight due to its potential and another G3 unit restanding when a trigger and a grade 3 is drive checked.
But, both cards consume a lot of Counter-Blast, and this resource may be needed much more for Alden who provides more reliable pressure.
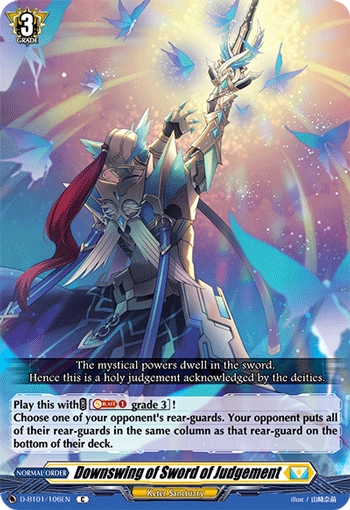
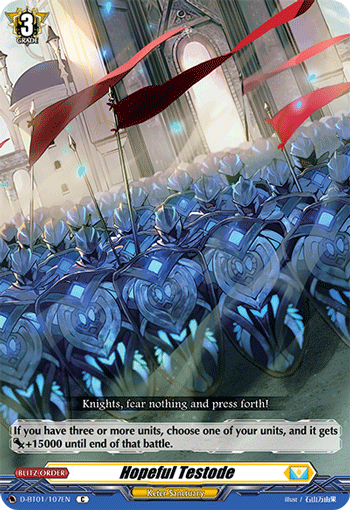
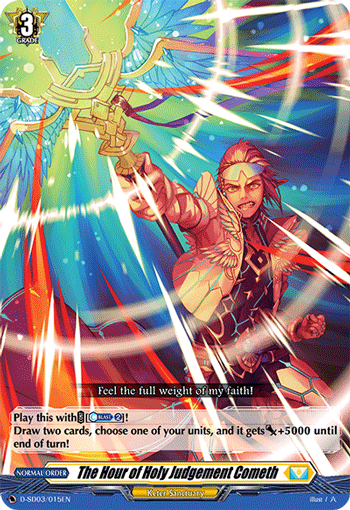
The three G3 Orders may be considered as well when running Bastion. The Hour of Holy Judgement Cometh isn’t played as much in competitive Bastion due to its high Counter-Blast usage, but is still a viable option. Downswing is a great control tool, but it can only be used during the players’ turn. It also requires the Soul-Blasting of a grade 3, so should be used sparingly. Hopeful Testode is a free 15 000 Shield that also activates Bastion’s ability when drive checked, so it’s a great defensive tool to be considered; but it loses out to Kokabiel due to the card’s incremental 5000 Shield per 2 grade 3 units.
Things to take note:
1. Defence
As a tradeoff for its unmatched offense, this deck is extremely fragile defensively. This is due to the deck’s high grade 3 count which maximises Bastion’s second ability, as well as to synergise well with other grade 3s run in the deck. As such, the best strategy for Bastion players is to aggressively attack the opponent to deplete their resources, such that they do not have the cards to mount a counterattack.
2. Deck management
Bastion players should keep a keen eye out for the type of cards left in the deck. This is so that they know whether or not to commit to a game-winning push or to reserve cards for the future. Bastion players need to remember how many grade 3s and Trigger Units are remaining in the deck, and use this knowledge to their advantage to plan an offense that can decimate the enemies’ board.
Hexaorb Ride Line
Playstyle: Midrange
Now, let’s have a look into the more mystical side of Keter Sanctuary. Feast your eyes onto the Sorceresses, who focus on manipulating the deck to consistently get triggers. By filtering the deck, Hexaorb players can get to their triggers and find their key pieces easily. Furthermore, by using Hexaorb’s powerful first ability, these players will be able to further strengthen their units whenever triggers are drive checked!
This deck requires a lot of planning in order to execute the game plan well. Careful management of resources and knowing when to commit units onto the field is something that all Hexaorb players should remember to take note of. If done correctly, Hexaorb players will be able to defeat their opponents in decisive battles with high-octane power. These cards are able to be found in the first Booster Set.
Sample Decklist:
| Card Name | Grade | Quantity |
|---|---|---|
| Hexaorb Sorceress | 3 | 4 (1 in ride deck) |
| Pentagleam Sorceress | 2 | 4 (1 in ride deck) |
| Tier Square Sorceress | 1 | 2 (1 in ride deck) |
| Tri Connect Sorceress | 0 | 1 (1 in ride deck) |
| Knight of War Damage, Fosado | 3 | 4 |
| Knight of Broadaxe, Rafluke | 3 | 4 |
| Divine Sister, Lepisto | 3 | 3 |
| Divine Sister, Tartine | 1 | 4 |
| Painkiller Angel | 1 | 4 |
| Aegismare Dragon | 1 | 4 |
| Knight of Heavenly Hammer, Gurgant (Critical) | 0 | 4 |
| White Fang Witch, Disma (Critical) | 0 | 2 |
| Exalting Knight, Eafred (Draw) | 0 | 3 |
| Knight of Heavenly Rend, Lif (Front) | 0 | 2 |
| Circuling Sorceress (Heal) | 0 | 4 |
| Light Dragon Deity of Honors, Amartinoa (Over Trigger) | 0 | 1 |
Ride Deck
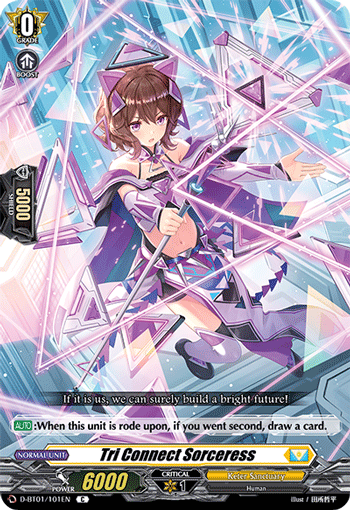
Tri Connect Sorceress is the First Vanguard for most Hexaorb players. The card has wonderful art, even though it doesn’t do much.

Tier Square Sorceress is the main grade 1 ride for the Hexaorb ride line. This card does not do anything when ridden, but when ridden by Pentagleam Sorceress, the player can pay the cost to draw a card, replenishing the card discarded for the cost of the ride deck.
This unit’s second ability is more niche, but it can be useful in removing one of the opponent’s more pesky rear-guards. Whenever the player’s drive check reveals a trigger, it can send an opponent’s front row rear-guard to the bottom of the opponent’s deck, acting as a form of field removal for the cost of one Counter-Blast.
All Hexaorb players will go into Pentagleam as their Grade 2 ride. When this card is rode upon, Tier Square’s ability to draw a card activates. Furthermore, when Pentagleam is ridden by Hexaorb Sorceress, it is able to look at the top three cards of the deck and arrange them in any Order; this ability can be used to prepare triggers for Hexaorb’s first ability to immediately activate during drive checks.
This card’s second ability allows the player to look at the top card of the deck and decide whether or not to leave it at the top of the deck or send it to the bottom of the deck, while giving itself a nice +2000 buff. This ability is free, and also helps to cycle through the deck for more impactful cards in the moment, like triggers and key pieces.
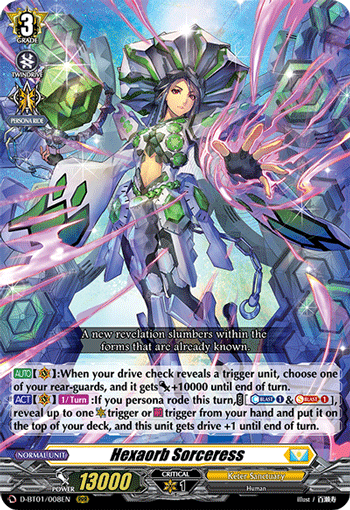
Hexaorb Sorceress is a Grade 3 ride that requires a fair amount of support from other pieces of the deck, but has potential to go the distance!
This card’s first ability gives an additional +10 000 power to any rear-guards whenever the player’s drive check reveals a trigger unit. This ability is not limited to once per turn, allowing it to continuously activate it to buff rear-guards as long as triggers are checked. This can be especially lethal when the player manages to drive check into the Keter Sanctuary Over Trigger Amartinoa to give rear-guards the ability to drive check as well.
Hexaorb’s second ability complements the card’s first ability well, and it gives the player the opportunity to stack the top of the deck with either a Critical or a Front trigger. This guarantees that the first ability will go off, when the trigger check would normally dictated by the randomness of the deck or by limited scrying abilities. However, this ability is limited to Persona Ride turns, so it will not be activated for most turns.
Must-haves:
Fosado is also an essential part of a Hexaorb deck because of the insane utility he brings. With Hexaorb, this unit can hit for powerful numbers to pressure the opponent to let the attack go through, and provide valuable Soul-Charge and Counter-Charge to Hexaorb.
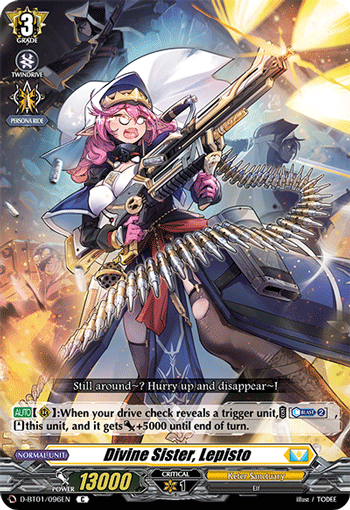
Lepisto, while only being an option in Bastion decks to potentially attack 5 times, is a necessity in Hexaorb to provide the offense to decimate opponents.
This deck without Lepisto is limited as a three-attack deck with no guard restrict abilities, so Lepisto is there to provide extra offensive power. This ability is costly, but it is necessary. This card shouldn’t be too difficult to pick up, though, given its Common rarity!
Options:
Once again, Solaria helps to cycle and filter the deck to get to more triggers and key pieces. This unit’s ability might be very costly in a deck that uses up quite a bit of resources, so it should be run sparingly. Nevertheless, Solaria is a great card that helps Hexaorb players retain card advantage.
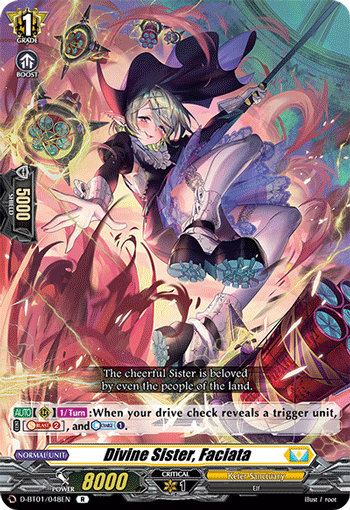
Faciata is an interesting option to run in the deck, because the card provides more Counter-Blast for Hexaorb to use. However, this should be run sparingly in the deck as its ability requires Soul-Blasts in order to Counter-Charge.
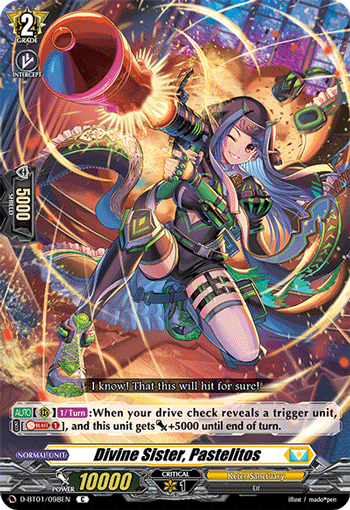
Pastelitos may be considered to run for players as the card provides a bit more offense for the deck, giving itself +5000 when a trigger is drive checked. Other impactful cards like Lepisto and Fosado seem like a more attractive option, but it is possible to consider playing this as it has Shield for guarding.
The debate on whether to use Criticals or Fronts more in Hexaorb is a contentious one, but it should be considered that both triggers provide significant value to Hexaorb.
Perhaps it may be a good idea to run both triggers in a more customised build instead of the standard rainbow trigger lineup or the 8-front/critical lineup. Having said that, attacking columns in Hexaorb decks should be able to hit big numbers on their own, so the pressure that Criticals give might be more valuable.
Things to take note:
1. Deck management
Hexaorb players need to know what kind of cards remain in the deck, and play in such a way that allows them to maximise their gains and win the small battles throughout the game. The advantage that Hexaorb players have is that they will frequently be able to manipulate the deck to their liking and keep the opponent guessing what kind of cards will appear in your drive checks.
2. Planning
There is a lot of strategy involved as Hexaorb players need to contemplate what kinds of cards they would want to see on the top of their deck to maximise Hexaorb’s ability. Ideally, they would want to find more triggers and this can be done with units that allow players to filter through their deck and rearrange the Order of cards.
However, as the number of units that can do this in the deck are limited, Hexaorb players need to use such abilities wisely to find the needed triggers. As such, Hexaorb players will also need to have a good memory of the Order of cards placed on top of the deck, such that they don’t waste these abilities on relooking at the cards.

Magnolia Ride Line
Playstyle: Aggro
We now traverse the lands of Stoicheia, where we meet the magnificent Sylvan Beasts that roam the forested regions of the nation. While these units are adorable and regal in nature, they are a formidable force to fight against on the battlefield.
This deck aggressively attacks the opponent, being able to attack up to four times the moment Magnolia enters the field! Furthermore, when Persona Ride has occurred, Magnolia’s full potential is unlocked, allowing the player to attack up to six times with their units! In the anime, Megumi Okura has shown that this deck is not something to be looked down upon. Cards in this deck can be found in the Start Deck 04: Megumi Okura -Sylvan King-.
This deck does require careful resource management as it is very difficult to regain the necessary resources to push for victory if such resources were not stockpiled earlier.
Sample Decklist:
| Card Name | Grade | Quantity |
|---|---|---|
| Sylvan Horned Beast King, Magnolia | 3 | 4 (1 in ride deck) |
| Sylvan Horned Beast, Lattice | 2 | 4 (1 in ride deck) |
| Sylvan Horned Beast, Charis | 1 | 3 (1 in ride deck) |
| Sylvan Horned Beast, Lotte | 0 | 1 (1 in ride deck) |
| Sylvan Horned Beast, Giunosla | 2 | 4 |
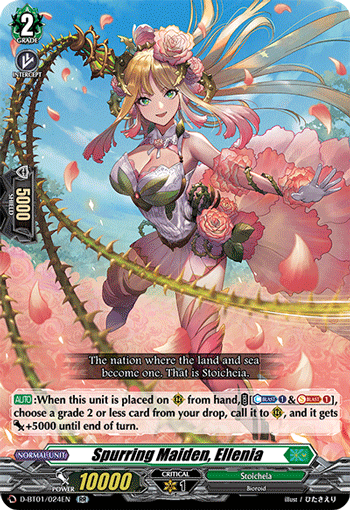
| Spurring Maiden, Ellenia | 2 | 4 |
| Ghost Chase (Blitz Order) | 2 | 3 |
| Spiritual Body Condensation (Normal Order) | 1 | 2 |
| Conspiring Mutant, Admantis | 1 | 4 |
| Planar Prevent Dragon (Perfect Guard) | 1 | 4 |
| Sylvan Horned Beast, Jackalope (Critical) | 0 | 4 |
| Abyss Temptation (Critical) | 0 | 2 |
| Lost Child of Attachment (Draw) | 0 | 2 |
| Sylvan Horned Beast, Polatter (Draw) | 0 | 3 |
| Sylvan Horned Beast, Zlatorog (Heal) | 0 | 4 |
| Source Dragon Deity of Blessings, Blessfavor (Over Trigger) | 0 | 1 |
Ride Deck
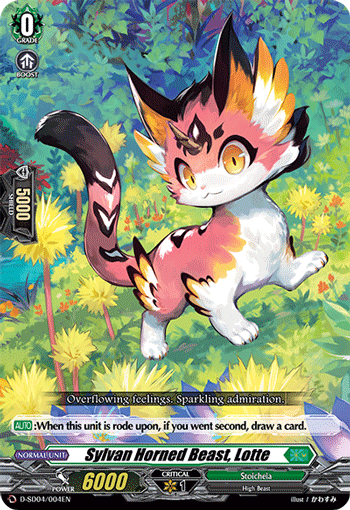
Lotte is the adorable First Vanguard for the Magnolia ride line. It’s cute, but as with most First Vanguards, it doesn’t change much in overall gameplay.
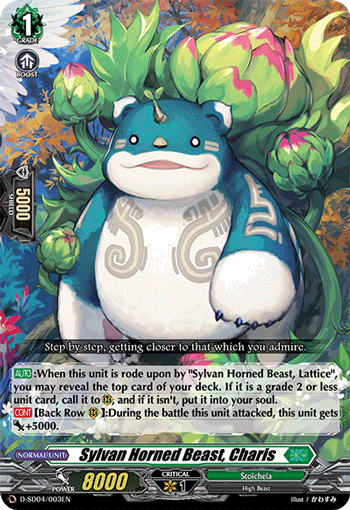
Some Magnolia players will go into Charis as their Grade 1 vanguard. Its first ability activates when Lattice rides over it the next turn; it can look at the top card of the deck and call a grade 2 or less unit card to the field, or put the card to the Soul if it isn’t.
More often than not, Charis’ ability will check for a grade 2 or less given the low grade 3 count in the deck, but it may check for an Order and unfortunately not call another rear-guard to the field. On the bright side, should players be unable to get an extra unit on the field, they can build up Soul for more explosive turns. The unpredictable nature of this card may encourage players to use another Grade 1 as their first vanguard ride, but that will be covered later.
Its second ability gives itself power when it attacks from the back row, which is the main gimmick of Magnolia.
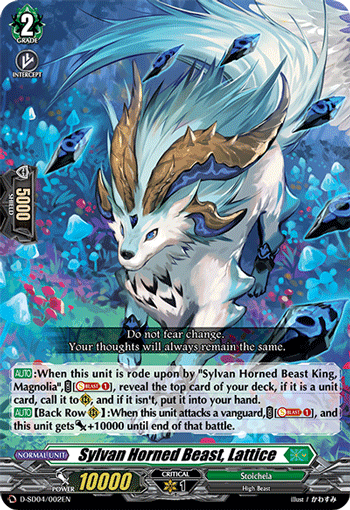
Lattice is the Grade 2 card that most Magnolia players will go into. When rode upon, Charis’ ability activates to have a potential chance of adding another body to the field to attack the opponent aggressively early.
Its first ability activates when Magnolia is rode upon, and it works similarly to Charis’ first ability, except that when an Order is revealed, it will be put into the player’s hand instead of the Soul. This ability is still unpredictable, and as such people may consider running another grade 2 instead in the Ride Deck.
Its second ability allows it to become a threatening attacker, but it requires it to be attacking in the back row and 1 Soul has to be used.
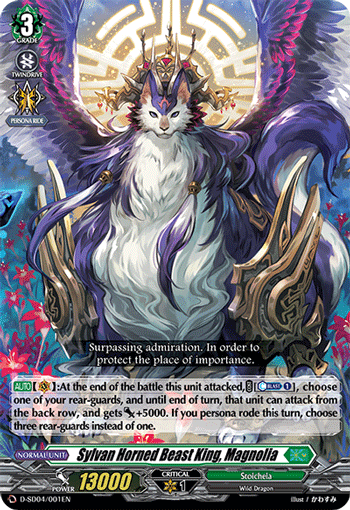
Magnolia is the main Vanguard for this deck. It only has one ability, but it is a powerful one at that. After it attacks, it can give one back row rear-guard the ability to attack from the back row for the cost of one Counter-Blast. This ability allows the deck to consistently hit 4 attacks every turn (of course, with sufficient resources).
During Persona Ride turns, this ability is further enhanced, as Magnolia can now choose three units instead of one to attack from the back row. The threat of 6 attacks is extremely intimidating in this format. Defensive triggers may impede your offensive turns, though, so play around those carefully to stay ahead!
Must-haves:
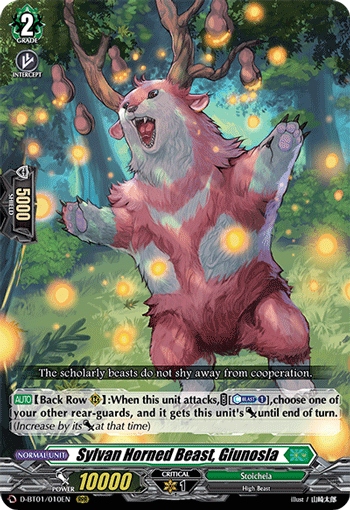
Giunosla is one of the highest potential cards in the deck. Its ability activates when it attacks from the back row, and it gives its power to another rear-guard at the cost of 1 Counter-Blast. This ability on its own will basically give 15 000 power to another rear-guard (given that Magnolia will give the back row +5000 power after using its ability), but it can do so much more.
It would be extremely awesome (but also improbable) to drive check into the Over Trigger and give this unit the +100 000 000 power buff. It can be even more exciting if there are two Giunoslas on the field and the Over Trigger used is Olbaria. The power stacking of Giunosla is what makes this deck quite powerful in theory.
Resource management is always important in this deck, and it is important that players do not waste resources early to prevent Giunosla from being active during turns that warrant pushing for game.
Spiritual Body Condensation is a must-run in all Stoicheia decks. It allows the player to superior call a unit with a grade equal to or less than the player’s vanguard.
When the player is on Magnolia, this means that any card can be called from the drop for the cost of one Soul. It is an extremely important card that can retrieve key pieces from the drop, and it should always be in the minds of Magnolia users during deckbuilding.
Ellenia fulfills a similar role to Spiritual Body Condensation, but the card acts as an extra body on the field and has Shield value. Of course, this ability is only limited to grade 2 or less cards in the drop, but the restriction does not restrain the deck as the only other grade 3 usually run is just Magnolia. Both cards are important for Magnolia to recover key pieces lost earlier in the game, but both need to be used sparingly as well.
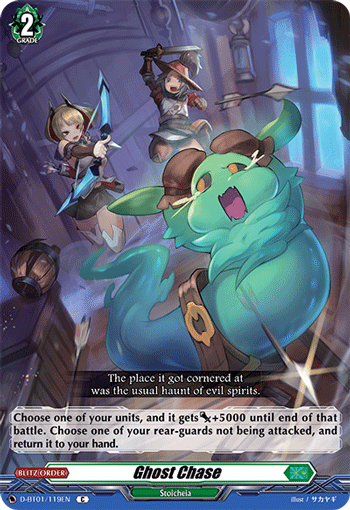
Ghost Chase is one of the most integral defensive cards in Stoicheia, and it should remain a staple card in many Stoicheia decks for a long time.
When this Blitz Order is played during the opponent’s battle phase, the player may give one of their units +5000 power until the end of the battle to help guard against an attack.
Furthermore, Ghost Chase can bounce one of the player’s rear-guards back to hand. This allows Magnolia to bring back a unit on the field for a myriad of purposes: to be used next turn, to be protected against opponent’s attacks or effects, to be used for Shield value etc. (for example bouncing a Perfect Guard or Over Trigger for guarding)
The utility that Ghost Chase provides is too good to pass up, and thus this card should always be run in Stoicheia decks, more so in Magnolia which needs defensive options against decks that can counterplay their aggressiveness.
Options:
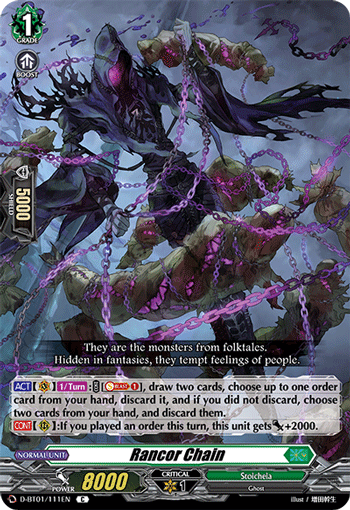
Rancor Chain may be considered to be a replacement grade 1 ride instead of Charis. Charis may be deemed too unpredictable and unreliable, so Rancor Chain can eliminate that randomness.
Its ability allows it to draw two cards and discard an Order from hand, allowing the Magnolia player to draw more cards and find key pieces faster. The Order discarded can be retrieved later by Black Tears Husk Dragon as well, so there essentially is a gain in advantage if Rancor Chain is used.
This card can also be Soul-Blasted later and revived by Ellenia and Spiritual Body Condensation to act as a booster.

Black Tears Husk Dragon can also replace Lattice as a grade 2 ride. It can retrieve the Order discarded by Rancor Chain and also serves as a good beater when it is Soul-Blasted and revived from the drop by Spiritual Body Condensation.
Once again, an interesting option to be considered by Stoicheia players; this tech choice has become more and more favoured by Magnolia players to improve the consistency and early game of their deck.
Of course, going into Rancor Chain and Black Tears Husk Dragon would sacrifice the aggressiveness that Charis and Lattice give.
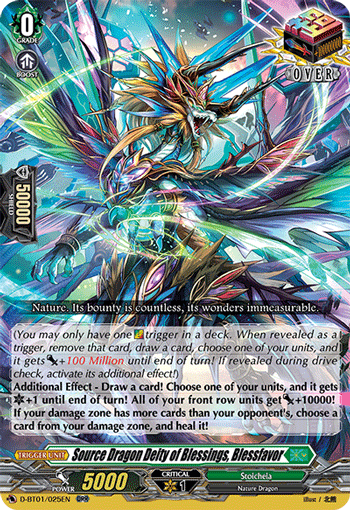
Players may consider using Blessfavor or Olbaria. Olbaria may be used in favour of players who want to pull off the double Giunosla combo, even though it may not occur frequently.
Blessfavor is generally the more all-rounded option, as revealing it as a trigger will always feel good, no matter the occasion. Serving as a “rainbow” trigger, it will always benefit the player who uses it when it is revealed during checks.
Things to take note:
1. Resource management
While the Sylvan Beasts are quite aggressive, they may run out of resources quickly if mismanaged. Players will need to use their resources conservatively, and gauge whether or not committing more resources to an attack is worth it in the long run.
2. Field Control
Magnolia is also quite susceptible to field control from the opponent. This is especially true in matchups against Eugene and Seraph Snow, as they have a way to remove Magnolia’s allies from the board. While the Magnolia player is able to retrieve their units from the Prison, they will have to pay resources in order to do so, something that may hinder their aggression. As such, battles against such decks have to be extremely well-planned, so that Magnolia’s allies are not used for a meaningless attack that benefits the opponent instead.
Zorga Ride Line
Playstyle: Midrange
In Stoicheia, one must always be careful of the dreaded seas. This is because Zorga and his pirate crew of ghosts and monsters roam the waters of the nation freely, wreaking havoc and chaos wherever they go.
This deck is extremely powerful, being able to attack the opponent with high-powered columns; furthermore, it makes use of the special keyword “Alchemagic” to fuse the power of two Normal Orders together to do wondrous things. In the anime, Masanori Iseki has shown his prowess in using this deck to win games overwhelmingly in his favour.
This deck requires a lot of planning in order to create attacking columns that are difficult for the opponent to guard; but when pulled off correctly, it will decimate the opponent’s defenses. These cards are readily found in the first Booster Set.
Sample Decklist:
| Card Name | Grade | Quantity |
|---|---|---|
| Mysterious Rain Spiritualist, Zorga | 3 | 4 (1 in ride deck) |
| Black Tears Husk Dragon | 2 | 4 (1 in ride deck) |
| Rancor Chain | 1 | 4 (1 in ride deck) |
| Dream Nibbling | 0 | 1 (1 in ride deck) |
| Hydraulic Ram Dragon | 3 | 4 |
| Grief, Despair and Rejection (Normal Order) | 3 | 3 |
| Cursed Souls Squirming in Agony (Normal Order) | 3 | 2 |
| Inheritance Maiden, Hendrina | 2 | 4 |
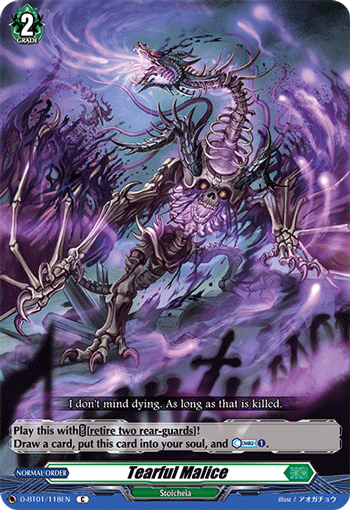
| Tearful Malice (Normal Order) | 2 | 1 |
| Ghost Chase (Blitz Order) | 2 | 3 |
| Spiritual Body Condensation (Normal Order) | 1 | 3 |
| Conspiring Mutant, Admantis | 1 | 4 |
| Planar Prevent Dragon (Perfect Guard) | 1 | 4 |
| Abyss Temptation (Critical) | 0 | 4 |
| Elegy Pixy (Heal) | 0 | 4 |
| Lost Child of Attachment (Draw) | 0 | 3 |
| Sylvan Horned Beast, Jackalope (Critical) | 0 | 4 |
| Source Dragon Deity of Blessings, Blessfavor (Over Trigger) | 0 | 1 |
Ride Deck
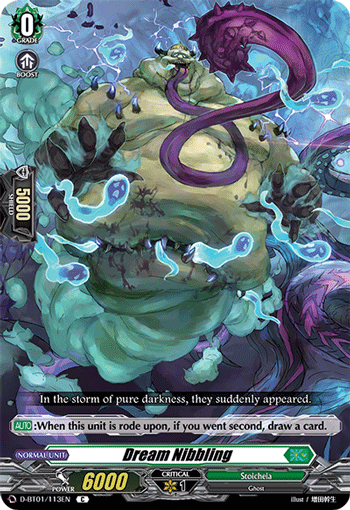
Dream Nibbling is a terrifying starting vanguard, in terms of aesthetics. It simply serves as Soul fodder for Rancor Chain to use its ability.
Rancor Chain’s first ability allows it to draw two cards and discard an Order from hand, allowing the player to draw more cards and find key pieces faster.
The Order discarded can be retrieved later by Black Tears Husk Dragon as well, so there essentially is a gain in advantage if Rancor Chain is used.
This card can also be Soul-Blasted later and revived by Spiritual Body Condensation to act as a booster. This card is very powerful and helps to boost the consistency of Zorga in getting more key pieces.
Black Tears Husk Dragon retrieves the Order discarded by Rancor Chain when it is rode upon.
It also serves as a good attacker whenever an Order is used during the player’s turn. Do note that this card cannot retrieve Blitz Orders, so Ghost Chase, Call to the Beasts and Sealed Path should not be discarded by Rancor’s ability if possible.
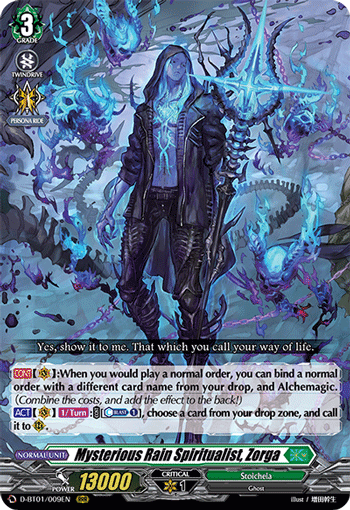
With Zorga, a new gimmick comes into play: Alchemagic. When the player would play a Normal Order during their turn, they may Alchemagic, and combine the Order with a different Normal Order in the drop by paying both their costs.
This ability allows the Zorga player to mix-and-match Orders together to fit the current situation. Be it using Spiritual Body Condensation and Grief, Despair and Rejection to push for damage against the opponent, or to use Tearful Malice and Spiritual Body Condensation to get some units onto the field and recover resources, the possibilities of combinations are infinite for Zorga. With future sets, Zorga builds will become even more diverse and complex.
Zorga’s second ability allows the player to call a card from the drop to a rear-guard circle, filling the board with attackers or activate on-place abilities.
Must-haves:
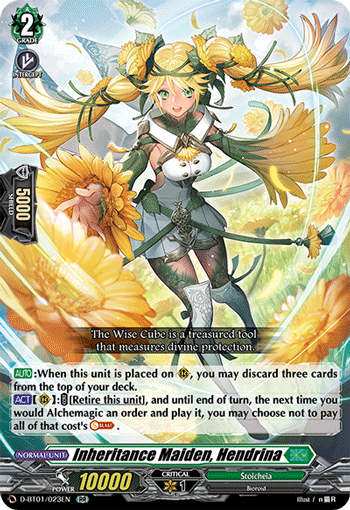
Hendrina is an important card in Zorga builds due to both of the card’s impactful abilities. When this card is placed on a rear-guard circle, the player may choose to discard three cards from the top of the deck.
This ability allows the player to find more cards to use; like Orders in the drop for Alchemagic or attackers to be resurrected by Zorga or Spiritual Body Condensation. This ability is also optional, giving the player the choice on whether or not to discard; this is especially relevant if the player has few cards left in the deck.
Hendrina’s second ability removes itself from the field, but nullifies the cost of Soul-Blast for Alchemagic. It’s a great way to maintain Soul resources for Zorga decks.
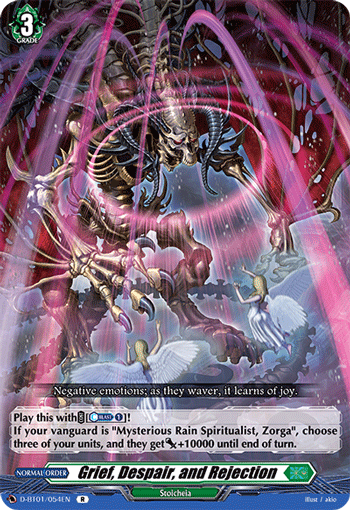
This Order is what gives Zorga decks the ability to attack with incredible power. The Order gives any three units +10 000 power until the end of the turn, and it is a great way to force more Shield out of the opponent’s hand for guarding their hefty attacks. As of now, there aren’t many choices for Orders to run, but this Order will suffice as a great way to raise the power of attacking columns.
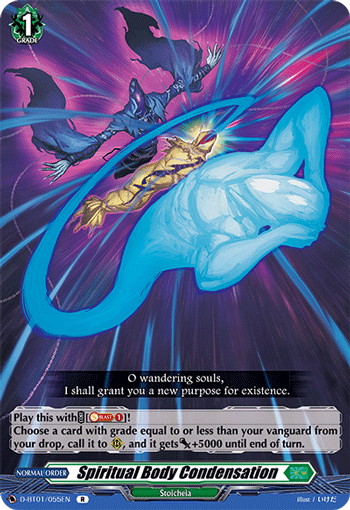
Once again, Spiritual Body Condensation is one of the best cards for Stoicheia as it can revive units onto the field that have on-place abilities or are integral to the offense of the deck.
Not much else needs to be said about this card, other than the fact that it must be played in every single Stoicheia deck. Pick up a playset of this as it will be in fashion for quite a while.
Ghost Chase is one of the most integral defensive cards in Stoicheia, and it should remain a staple card in many Stoicheia decks for a long time. When this Blitz Order is played during the opponent’s battle phase, the player may give one of their units +5000 power until the end of the battle to help guard against an attack.
Furthermore, Ghost Chase can bounce one of the player’s rear-guards back to hand. This allows Zorga to bring back a unit on the field for a myriad of purposes: to be used next turn, to be protected against opponent’s attacks or effects, to be used for Shield value etc. (for example bouncing a Perfect Guard or Over Trigger for guarding)
The utility that Ghost Chase provides is too good to pass up, and thus this card should see play a lot in Stoicheia decks.
Options:
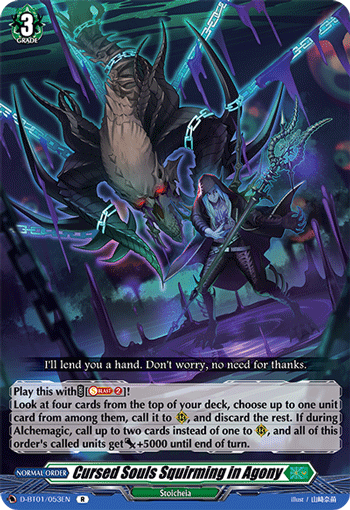
Both of these Orders may be considered in deck-building, as they help to build up the field and generate resources for Zorga.
That said, they may be a bit too costly to be used, and should be used sparingly or run in lower deck ratios in order for them to not interfere with the gameplan of Zorga.
Things to take note:
1. Deck management
There are cards in the deck such as Hendrina that help to increase the size of the drop significantly, so that more key pieces like Normal Orders and attackers can be used during the Zorga player’s turn. However, the cards in the deck may run low, and thus players need to remember to conserve the cards in their deck so that they do not lose the game by decking out.
2. Planning
It is extremely important for Zorga players to form optimal attacking columns that attack the opponent with high numbers that force more Shield out of their defenses. Furthermore, knowing which Normal Orders to use during what situation is also the key to victory.

Seraph Snow Ride Line
Playstyle: Control
Looking over to the icy terrain of Brandt Gate, we see the Aurora Battle Princesses fighting their battles of justice against evildoers.
These units focus their power around a Set Order known as a Prison, which allows them to Imprison the opponent’s rear-guards within the Prison. These cards may only be released from the Prison if the opponent pays a cost during their turn. The more cards left in the Prison, the better it is for Seraph Snow players. They will slowly be able to win the battle, controlling the flow of the game in their favour. It is very clear that this deck is not one to be trifled with, as seen by how Tomari Seto has played this deck in the anime.
While this deck may struggle against decks that can resist the power of Prison, it is still able to fight well against others by removing the opponent’s units from the field consistently. Overall, this deck requires lots of planning in order to ensure a decisive victory. Seraph Snow players can easily find their cards in Start Deck 05: Tomari Seto -Aurora Valkyrie-.
Sample Decklist:
| Card Name | Grade | Quantity |
|---|---|---|
| Aurora Battle Princess, Seraph Snow | 3 | 4 (1 in ride deck) |
| Aurora Battle Princess, Risatt Pink | 2 | 1 (1 in ride deck) |
| Aurora Battle Princess, Kyanite Blue | 1 | 1 (1 in ride deck) |
| Aurora Battle Princess, Ruby Red | 0 | 1 (1 in ride deck) |
| Granaroad Fairtigar | 3 | 3 |
| Aurora Battle Princess, Agra Rouge | 2 | 4 |
| Grapple External | 2 | 4 |
| Hyperspeed Robo, Chevalstud | 1 | 4 |
| Detonation Mutant, Bobalmine | 1 | 4 |
| Autonomic Caution | 1 | 2 |
| Galaxy Central Prison, Galactolus (Set Order) | 1 | 2 |
| Violate Dragon (Perfect Guard) | 1 | 4 |
| Cardinal Draco, Barbizonde (Critical) | 0 | 4 |
| Aurora Battle Princess, Lourus Yellow (Critical) | 0 | 4 |
| Aurora Battle Princess, Amy Orange (Draw) | 0 | 3 |
| Aurora Battle Princes, Treuse Green (Heal) | 0 | 4 |
| Star Dragon Deity of Infinitude, Eldobreath (Over Trigger) | 0 | 1 |
Ride Deck
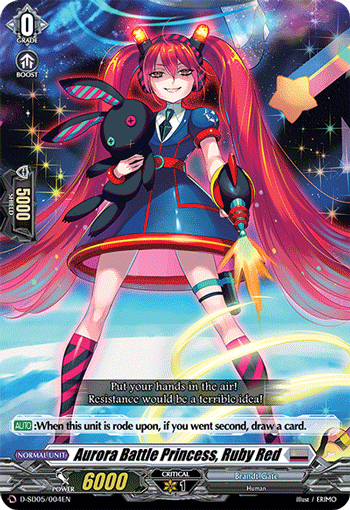
Ruby Red is the starting vanguard for the Battle Princess series. Even though this card doesn’t do much, the card art poses Ruby Red as a dangerous threat not to be trifled with. Watch out!
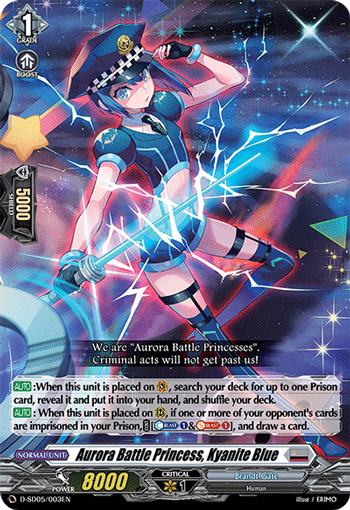
Kyanite Blue is the reliable Grade 1 in the deck that enables the Battle Princess player to get the main feature active and running: the Prison Galactolus.
Other than that, this card doesn’t really serve any purpose; but if players decide to run this in higher deck ratios, the second ability can become more relevant.
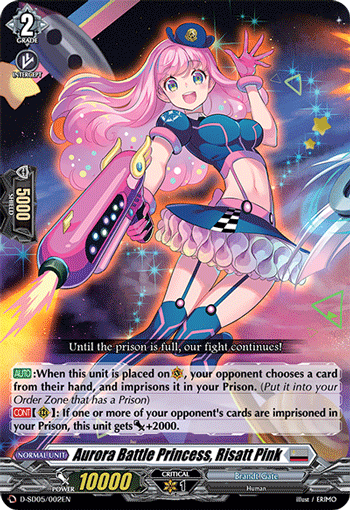
Risatt Pink is the only card that allows Battle Princess players to imprison one of the opponent’s cards in hand. This ability is especially helpful when the opponent chooses not to call any units down onto the field.
This only happens when it is placed on the vanguard circle, but this will essentially help to activate cards like Grapple External to be able to hit for respectable numbers early.
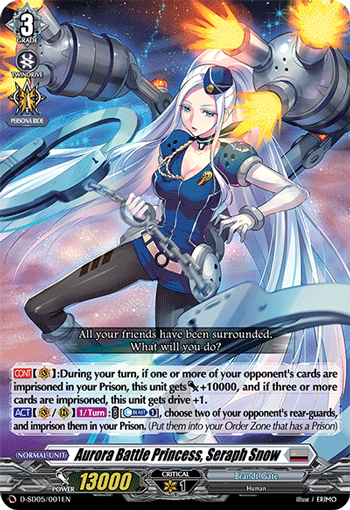
Seraph Snow is the main Grade 3 unit of the Battle Princess deck, and this card is a great enabler for Prison to function.
Its first ability adds pressure to the opponent to remove their units from the Prison during their turn. If not, Seraph Snow has the potential to gain +10 000 power and even an extra drive if they leave 3 or more rear-guards in the Prison. This is especially damaging against rear-guard reliant decks like Magnolia.
This card’s second ability acts as another way to imprison the opponent’s rear-guards. It’s a good ability that allows for field control and forces the opponent to rethink what units they would like to call down onto the board.
Must-haves:
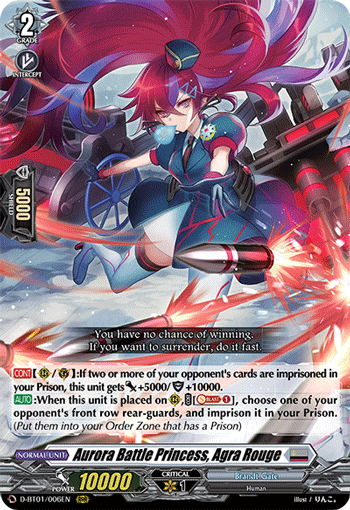
Agra Rouge is an important card in the functioning of the deck. This card is able to gain power and Shield should two or more of the opponent’s rear-guards be left in the prison.
This builds more to the control aspect of the Battle Princess series, allowing them to calmly guard against the opponent’s attacks and slowly overwhelm them.
Its second ability can imprison an opponent’s front row rear-guard for the cost of one Soul-Blast. This helps to build up for Seraph Snow’s three-rear-guard requirement for the extra drive.
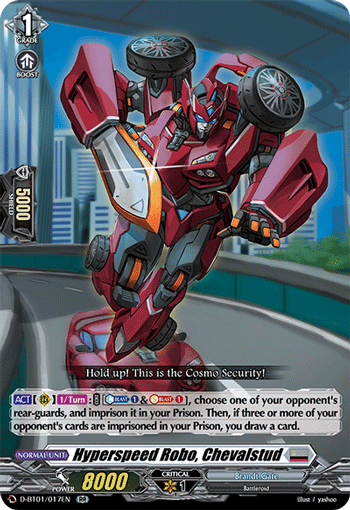
Chevalstud is another important supporting unit that can imprison an opponent’s rear-guard and give the player an advantage in hand by drawing a card. It’s a simple ability, but it allows the player to gather more resources to outlast the opponent. This should be a 4-of for the foreseeable future.
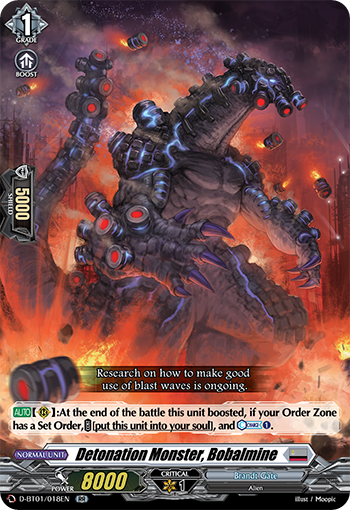
Bobalmine is an essential card in both Brandt Gate decks. It provides resources in the form of Soul and Counter-Charge after boosting. Of course, there is the requirement of a Set Order being present, but that is always going to be a condition that is actively met by the Prison set Order. Bobalmine’s ability is so cost-friendly, there should be no excuse for not running it in the deck.
Options:
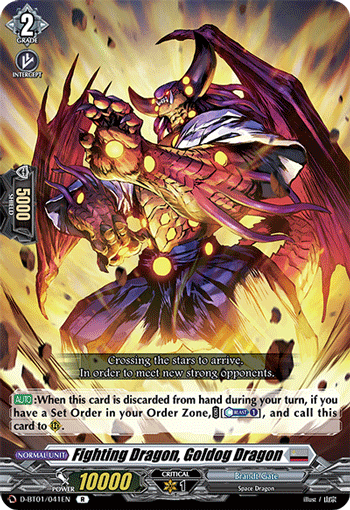
Goldog Dragon may be considered to be used during Ride deck discarding to add an additional body onto the field. Of course, this can’t be used during Grade 1 turns (given that there may not be damage to use for Counter Blast and the Set Order would not be in play at the time of discarding).
This is a great way to preserve the hand advantage and also put an attacker early that can be annoying for the opponent to deal with.
This grade 1 Blitz Order may be considered to add to the defense and control aspect of the deck.
However, the Counter-Blast cost to cast this Blitz Order is very expensive, and it would be taking up slots in the deck that could instead run more impactful cards that contribute to Imprisoning the opponent’s units, so this would probably only see play as a 1 or 2-of in the deck.
Things to take note:
1. Counterplay
Players who know how to play well against this deck will make it difficult for Seraph Snow to shine. These players will commit fewer units to the board to deny Seraph Snow of the activation of the card’s first ability, and make it difficult for the deck to attain the 3-Card requirement in the Prison. As such, Seraph Snow players need to know how to counter these players, perhaps by denying the opponent necessary resources such as Counter-Blast and Soul-Blast.
Orfist Ride Line
Playstyle: Midrange
In the darkness of Brandt Gate lies a powerful foe: the Cardinals. These units focus on changing the World state by playing Set Orders known as Worlds.
They aim to engulf reality in darkness and overwhelm the enemy with Shadow Army tokens that are called out by the Cardinal Deus itself, Orfist. This deck focuses on reaching the Abyssal Dark Night state, in order to activate Orfist’s ability to summon Shadow Army tokens to attack the opponent aggressively.
While this deck has a fairly straightforward gameplan, Orfist players must remember to conserve their resources, especially Counter-Blast. However, once this resource is secured, Orfist players are all but assured victory. These cards will be found in the first Booster Set.
Sample Decklist:
| Card Name | Grade | Quantity |
|---|---|---|
| Cardinal Deus, Orfist | 3 | 4 (1 in ride deck) |
| Cardinal Noid, Cubisia | 2 | 4 (1 in ride deck) |
| Cardinal Noid, Routis | 1 | 4 (1 in ride deck) |
| Cardinal Fang, Phovi | 0 | 1 (1 in ride deck) |
| Lightning Thief Monster, Jabbatail | 3 | 3 |
| In the Darkness Nobody Knows (Set Order) | 3 | 4 |
| Polar Cold Monster, Drumler | 2 | 3 |
| Hollowing Moonlit Night (Set Order) | 2 | 4 |
| Detonation Mutant, Bobalmine | 1 | 4 |
| Useful Recharger | 1 | 3 |
| Violate Dragon (Perfect Guard) | 1 | 4 |
| Cardinal Draco, Barbizonde (Critical) | 0 | 4 |
| Aurora Battle Princess, Lourus Yellow (Critical) | 0 | 4 |
| Cardinal Fang, Fulgrus (Draw) | 0 | 3 |
| Cardinal Prima, Nabilem (Heal) | 0 | 4 |
| Star Dragon Deity of Infinitude, Eldobreath (Over Trigger) | 0 | 1 |
Ride Deck
Phovi is the grade 0 starting vanguard for Orfist players. It doesn’t do much, as with most starting vanguards, but the art that it has is magnificent.
Routis’ ability activates when it is ridden, searching the deck for a World card, and putting it into the player’s hand. This gives the player a bit more consistency in obtaining the World Set Orders, instead of being forced to play 4-ofs of both World Set Orders.
Routis’ second ability is a humble one, and it gains +2000 power when attacking or boosting if the World is Dark Night or Abyssal Dark Night.
Cubisia is a powerful grade 2 ride that can give any unit plus +5000 power when a World is put into the Order zone. This runs in conjunction with the World Order searched out by Routis’ ability, so this power buff is guaranteed to go off every time this card is ridden.
Cubisia also gains a +5000 power buff during the player’s turn if the World is Abyssal Dark Night, so it can be used as a viable beater with the Shadow Army tokens.
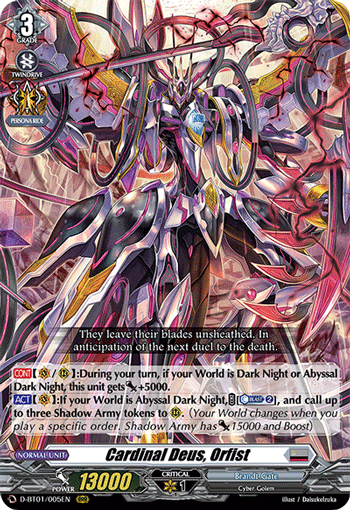
Cardinal Deus, Orfist is one of the most interesting cards in the current format. This card gains a +5000 power bonus on the player’s turn based on what the World state is. This allows Orfist to hit for higher numbers and force out more Shield from the opponent during attacks.
Orfist’s second ability can be activated if the World is Abyssal Dark Night. For the cost of 2 Counter-Blast, this card can call up to three Shadow Army tokens to the field. These Shadow Army tokens are grade 1 units with boost and 15 000 power, and can act as powerful attackers on their own and boosters for Cubisia or Jabbatail.
What is interesting to note is that this ability is repeatable during the turn, so it is possible for an Orfist player to fill their entire board with Shadow Army tokens for the cost of 4 Counter-Blast.
Must-haves:
Bobalmine is an important card in both Brandt Gate decks, and it can be seen as a necessity for Orfist decks because Orfist requires a lot of Counter-Blast to pull off his Shadow Army summoning ability.
Bobalmine replenishes one Counter-Blast that Orfist may use for the following turn, after it boosts. The Soul that it gives is also quite relevant. Overall, Bobalmine is a great resource generator and should be maxed out in a current deck.
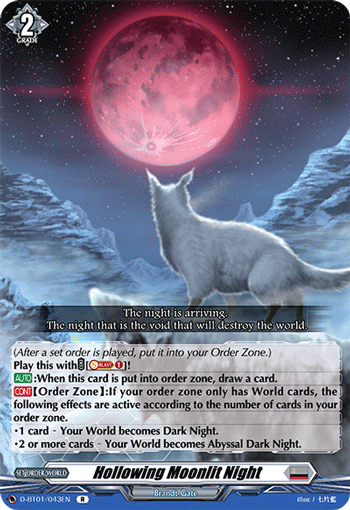
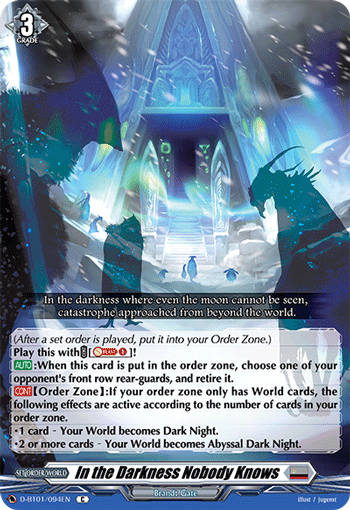
For Orfist players, they must always remember to run these World Order cards. Better World Orders may be released in the future, but as of the first set, it is essential to always run them in the deck in large quantities in order to guarantee reaching Abyssal Dark Night by the time Orfist is active on the board.
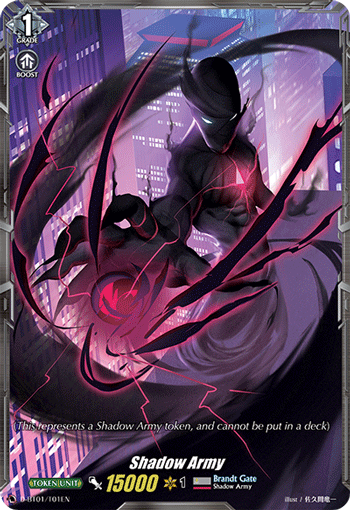
Of course, all Orfist players cannot forget to bring along Shadow Army tokens. One must always have at most 5 tokens to bring along, just in case the game plan calls for a board full of tokens. In competitions, missing any tokens during gameplay can lead to disqualification, so players should always come prepared.
Options:
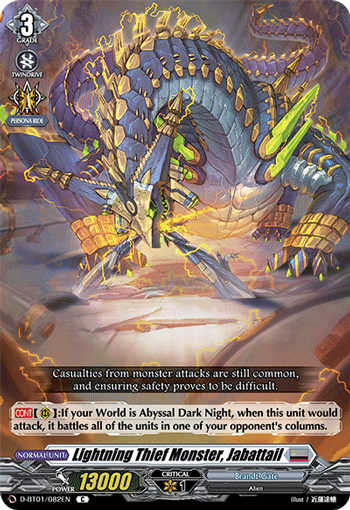
Jabattail is a great tech option in the deck. If the World is Abyssal Dark Night, it can attack all the units in one of the opponent’s rear-guard columns.
This allows it to attack important boosting units and adds pressure to the opponent to force out more Shield for their units, especially if both units targeted are important to defend.
In the scenario where this attacks the opponent’s vanguard and an important booster in a game-winning situation, it will force the opponent to more or less sacrifice their booster to guard this attack. Because of the lack of options for Orfist as of yet, this card can be freely run in high quantities.
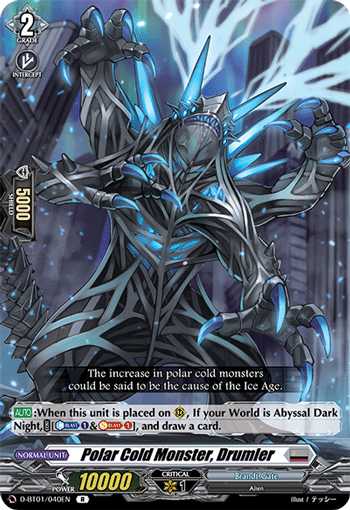
Drumler is also a good option in the deck, as it can help to cycle the deck to get to more important key pieces by drawing a card.
However, it can be argued that because this card only becomes active when two or more Worlds are active, players may wish to play fewer copies of it.
Adding to this, the cost for drawing is quite hefty, and it competes with Orfist for Counter-Blast as well. So, this card should be run in lower quantities in order to prevent interference with the main feature of the deck.
Things to take note:
1. Counter-Blast
Orfist players will find that the use of Counter-Blast is extremely frequent as they would need to call Shadow Army tokens frequently to the board. As such, they must exercise care to not deplete their resources early. Even though Brandt Gate has access to Counter-Charge cards like Bobalmine, they still need to ensure that they have sufficient resources to make important plays.
2. Planning
Furthermore, Orfist players will need to plan the most optimal attacking pattern that can maximise attacking power against the opponent’s defenses. This may mean calling Shadow Army tokens as boosters for powerful grade 3 units that can form attacking columns that force out more Shield from the defending opponent. Depending on the situation, Orfist players need to know how to make shrewd maneuvering to win the game.
Conclusion
CARDFIGHT!! VANGUARD overDress breathes new energy into the 10-year old game. The decks in the format are fun to play, there are a variety of options to choose from. The first set, Booster Pack 01: Genesis of the Five Greats has already been released, with more cards for future sets in the making. Look out for Vanguard, because it’s on a roll right now!